Minor updates in Sept 2024
What if you had a special power revealing every bird as a glowing spot of light? Birds obscured behind a tangle of branches, in distant trees, camouflaged, or hidden in darkness would be easy to locate – just look for the glowing blob. In the right situations, that’s what you get when thermal birding.
“Thermal birding” is an invented phrase for using a thermal imaging device (usually a thermal monocular) to locate birds in otherwise challenging environments. A camouflaged owl in the shadows, obscured behind layers of twigs? Viewed through a thermal imaging device, it will glow. Shorebirds that look like mud? They will turn into bright little embers. In optimal conditions, thermal birding can be rewarding – enabling you to more easily locate birds that would otherwise remain hidden. But even in sub-optimal conditions a thermal imaging device can be a helpful tool to add to a kit.
In the past few years, thermal imaging technology has made big jumps in quality and affordability – products previously costing thousands of dollars, now costs hundreds… and the quality is better.
Of course, it takes leap of faith to spend hundreds of dollars (or thousands if you have the budget) on a gadget you’ve never actually held in your hand, much less tried in the field. So, how do you know if a thermal imager is worth it for you? Well, hopefully this post can give you some perspective.
Infrared Light & Thermal Imagers
Did you know that right now, you are glowing? You can’t see the glow, but it is there. All objects emit infrared (or “IR”) light as a function of temperature. The hotter something is, the more infrared light it emits. This IR light is redder than red, and beyond the limit of human vision. A thermal imaging device picks-up this IR light, interprets it into a visible representation, and displays it on a screen you look at.

Thermal imaging is often lumped into a category of “night vision” – this is unfortunate. While you can use thermal imaging to effectively “see” at night, the most compelling time to use thermal imaging for birding is during daylight.
When looking through a thermal imaging device, what you see is the heat profile of whatever you’re looking at. The time of day or amount of ambient light doesn’t really matter. What matters is the relative temperature of the subject to the rest of the environment. During a cool morning or cloudy dreary day, most natural objects are of similar temperatures. Birds and other warm-blooded animals are like little heat beacons in that environment – they glow with IR. While feathers are good insulators, plenty of IR heat radiates through them.
The term “Thermal imagers” is used to describe many types of thermal imaging devices. Thermal monoculars are hand-held units you hold up to your eye. Thermal scopes are mounted to a rifle. In some contexts, these devices are grouped under the term “thermal scopes”… which might include thermal monoculars. For birding, you most likely want to consider Thermal Monoculars. In this post, I use the terms a bit loosely.
Picking a Thermal Imaging Device
Not all thermal monoculars are the same. If you’ve tried a mediocre thermal imaging device (such as one of those units that bolts onto your cell phone) you might be underwhelmed. These can be cool to play with indoors, or for subjects close to you in ideal conditions, but they’re not much help finding birds. You can’t really see much with those units, and your impression will be even worse if conditions are poor (e.g. a warm sunny day). Using a sub-standard tool where it’s not useful is no way to judge the usefulness of a technology.
There are a lot of thermal monoculars on the market, and after looking at them for a little bit, you might get lost in a sea of specifications. Comparing models is less complicated than it it seems. There are two specifications that matter more than any others.
Sensor Resolution
Every digital imaging device sees the world as a grid of points, or pixels. A decent traditional camera might have a resolution of say 4000 x 5000 pixels, or 20 “megapixels”. Consumer thermal imaging sensors have resolutions around 300 x 400 pixels, or about 0.12 megapixel. If you’re familiar with this specification on a camera, you might think “this is incredibly crummy resolution, I won’t be able to see anything!”. That is not so. Remember, the goal of thermal birding isn’t to identify birds, but simply locate them. All you need to see is a glowing blob. That blob tells you “something is there”. Then, you use your binoculars or scope or camera or your eyeballs to see what it is. That said, the resolution of the unit is still key – 0.12 megapixel is a lot better than 0.01 megapixel (which is all you’ll get with the cheapest thermal imagers). A higher sensor resolution will pick-up smaller birds at greater distances.
Field of View
The field of view is how narrow or wide the view of the scene in the unit is. This is usually specified in degrees (both horizontal and vertical), and usually ranges from around 35 degrees for moderately wide to 10 degrees for fairly narrow. If your field of view is wide you’ll see a lot in the frame, but small objects – like birds – will be tiny. A narrow field of view will be more “zoomed in” enabling you to see small objects – like birds – at a greater distance.
Picking the right field of view is a trade-off. For birding, I think trending toward a narrow field of view is more useful (at least up to a point). You’ll make better use of those scant pixels, and be able to pick-out small birds much further away. But, in tighter environments you will have to do more panning around, which can get tedious. But that’s what birding sometimes is – stretches of tedium and frustration interrupted by moments of pure joy.
To determine the trade-off between sensor resolution vs. field of view, you can divide the two to get a number of “pixels per degree”. This enables you to compare different units more objectively. No manufacturer specifies “pixels per degree” – you have to do the math yourself. To save you some time, I’ve done that math on a variety of commercial thermal monoculars. This is not a comprehensive list. New models are being introduced and obsoleted all the time – it’s like the wild west in the world of thermal imaging! I’ve made some minor updates to the list below as of September 2024, but surely you’ll find some model I haven’t listed here. You can always “do the math” yourself for any other unit.
| Manufacturer | Name/model | Sensor resolution: Horizontal | Sensor resolution: Vertical | Field of view: horizontal | Field of view: Vertical | Pixels per degree: horizontal | Pixels per degree: vertical |
| AGM/Taipan | TM160 | 160 | 120 | 15.61 | 11.74 | 10.2 | 10.2 |
| AGM/Taipan | TM15-256 | 256 | 192 | 11.69 | 8.78 | 21.9 | 21.9 |
| AGM/Taipan | TM25-384 | 384 | 288 | 10.5 | 7.9 | 36.6 | 36.5 |
| AGM/Taipan | TM35-640 | 640 | 512 | 17.7 | 14.2 | 36.2 | 36.1 |
| AGM/Taipan | TM50-640 | 640 | 512 | 8.8 | 7 | 72.7 | 73.1 |
| Flir | Scout TK | 160 | 120 | 20 | 16 | 8.0 | 7.5 |
| Flir | Scout III – 320 | 336 | 256 | 17 | 13 | 19.8 | 19.7 |
| Flir | Scout III – 640 | 640 | 512 | 18 | 14 | 35.6 | 36.6 |
| Burris | BTH50 | 400 | 300 | 7.8 | 5.8 | 51.3 | 51.7 |
| Burris | BTH35 | 400 | 300 | 11.1 | 8.3 | 36.0 | 36.1 |
| Burris | BTH25 | 400 | 300 | 15.4 | 11.6 | 26.0 | 25.9 |
| Pulsar | Krypton XG50 | 640 | 480 | 8.7 | 6.5 | 73.6 | 73.8 |
| Pulsar | Helion 2 XP50 Pro | 640 | 480 | 12.4 | 9.3 | 51.6 | 51.6 |
| Pulsar | Axion 2 XQ35 | 384 | 288 | 10.7 | 8 | 35.9 | 36.0 |
| Leica | Calonox view | 640 | 512 | 10.5 | 8.4 | 61.0 | 61.0 |
| Sensmart | TD210 | 256 | 192 | 17.1 | 13 | 15 | 14.8 |
| Sensmart | TD410 | 400 | 300 | 13.6 | 10.3 | 29.4 | 29.1 |
| Sensmart | TD631LF | 640 | 480 | 12.5 | 9.4 | 51.2 | 51.1 |
| VOTJPYS | MK-IRS-E35 | 384 | 288 | 7.5 | 5.7 | 51.2 | 50.5 |
Of course, there is one more important specification missing from the above table – the price. Everyone’s budget varies, and prices of these units fluctuate. As of 2024, the units above range anywhere from a few hundred dollars to many thousands.
To make purchasing more difficult, it’s not easy to “try one in a store” to get a feel for it – most sporting goods stores don’t stock these, and if they do, they certainly don’t stock a wide range of them.
In my case, I looked for the most resolution-per-degree I could get at a reasonable price. in late 2022, that turned out to be the Burris BTH50, which at the time I got at a discount – about $1200. Would a unit like the Burris BTH35 offer enough resolution-per-degree, and not require as much panning and scanning in typical situations? Perhaps… but all-in-all I’ve been pretty happy with my choice. All the sample images and videos in this post are with the BTH50.
Disclaimer: Because we live in the world as it is today: I want to be clear that I’m not being paid for any endorsements.
There are a couple other specifications that do matter a somewhat – The weight of the unit, how long the battery lasts, and what the user interface is like. for the BTH50, it’s about as heavy and bulky as a pair of binoculars (but all concentrated on one side of course). The battery lasts around 3-5 hours of frequent use. There is a “standby mode”, which I think just shuts-off the screen, saving some power, and enabling the unit to power-on much more quickly.
Most of the other specs don’t matter too much. For example, a lot of vendors tout “digital zoom”. I’ve never once used digital zoom while thermal birding. The purpose of the thermal monocular is to determine “is there a bird?”. A glowing blob means there’s a bird (or small mammal or something else of interest), there’s no point in zooming into it. Also, don’t get confused by the resolution of the screen. What matters is the resolution of the sensor. The resolution of the screen will typically be much larger than the sensor resolution. It doesn’t matter all that much. Frame rate is one specification that can matter a little – a faster frame rate will enable you to pan-and-scan a little faster than a slow frame rate.
One side note – thermal monoculars, are almost exclusively marketed to hunters (as well as survivalists and search and rescue). As a result, most thermal monoculars are weatherproof.
Use of the Unit
Since you can’t actually see IR directly, the computer inside the device interprets the IR light into colors you see displayed on a screen. You look at the screen. All of these units include the ability to change the color profile of what you see, replacing the default shades of black/gray/white with other patterns. My favorite is what’s called “blue hot” on my unit, cool areas are blue, and the hottest areas show-up as red or yellow. This makes warm objects really pop, and is easier on the eyes than some of the other color schemes.
Some units have features that will do things like identify the brightest spot in the frame with a crosshair. This can be handy in some situations, though I usually find it distracting.
Use in the Field
Ok so you have your thermal monocular, and are ready to do some thermal birding. Now what? Remember, the purpose of a thermal imager is simply to locate birds, identifying them comes later.
There’s not much to it – get to a spot where you think there might be a bird. Maybe there is a lot of good habitat that’s difficult to see through. Maybe you’re at a location where you heard something you can’t readily see, or maybe you just have a gut feeling. Use the thermal monocular to methodically pan-and-scan around the scene. I usually prefer up-and-down and then left to right across the scene. What you’re looking for is any bright dot – a dot is a heat source. There’s no reason for there to be a hot spot on a mudflat or high up in a tree. It’s either a bird, a small mammal, or some other odd thing – a light, a distant building (behind the tree), or some kind of electrical apparatus. After you’ve located the subject, put the thermal imager aside, note the location as best you can and switch to your binoculars, scope or camera.
Thermal imagers can also be useful for investigating tree holes and nests – you can very quickly see if “anyone is home”… or perhaps more usefully, if “nobody is home” and you can move on. I’ve heard stories of birders staking-out a nesting hole for hours to see if the hole is being used. With a thermal imager, that process takes about 2 seconds.
Sometimes I will hear a singing bird, but can’t quite pinpoint it. If that bird doesn’t show-up on a quick scan with the thermal monocular (provided the conditions are good), it’s likely behind a branch or leaf.
I’ve found that thermal birding at night is fun, but ultimately not too rewarding. While you can locate birds that are roosting or active at night (the fun part), good luck identifying them. You would need a powerful light to do that, and that disturbs the birds. But, it can work in pre-dawn hours – so you can find an interesting bird while it’s still dark, and then wait for dawn to break.
On my unit, I’ve had to turn down the brightness of the display to the minimum. At night, even the minimum setting is still too bright – it takes my eye some time to equalize to the ambient light.
The thousand dollar question is – from how far away can you see a sparrow-sized bird? Well, it depends. First, it depends on the unit you’re using – see that measure of “pixels per degree” above. Next it depends on the conditions. In good conditions (a cool cloudy day), with my own unit, I can see a sparrow-sized bird from over 100 yards. That’s not an exaggeration. What I see at that distance is a tiny dot. But it is unmistakably a bird (or sometimes a mouse or squirrel). Again, the point isn’t to identify the bird with the thermal imager, just to locate it.
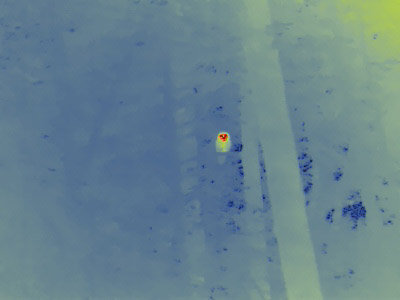
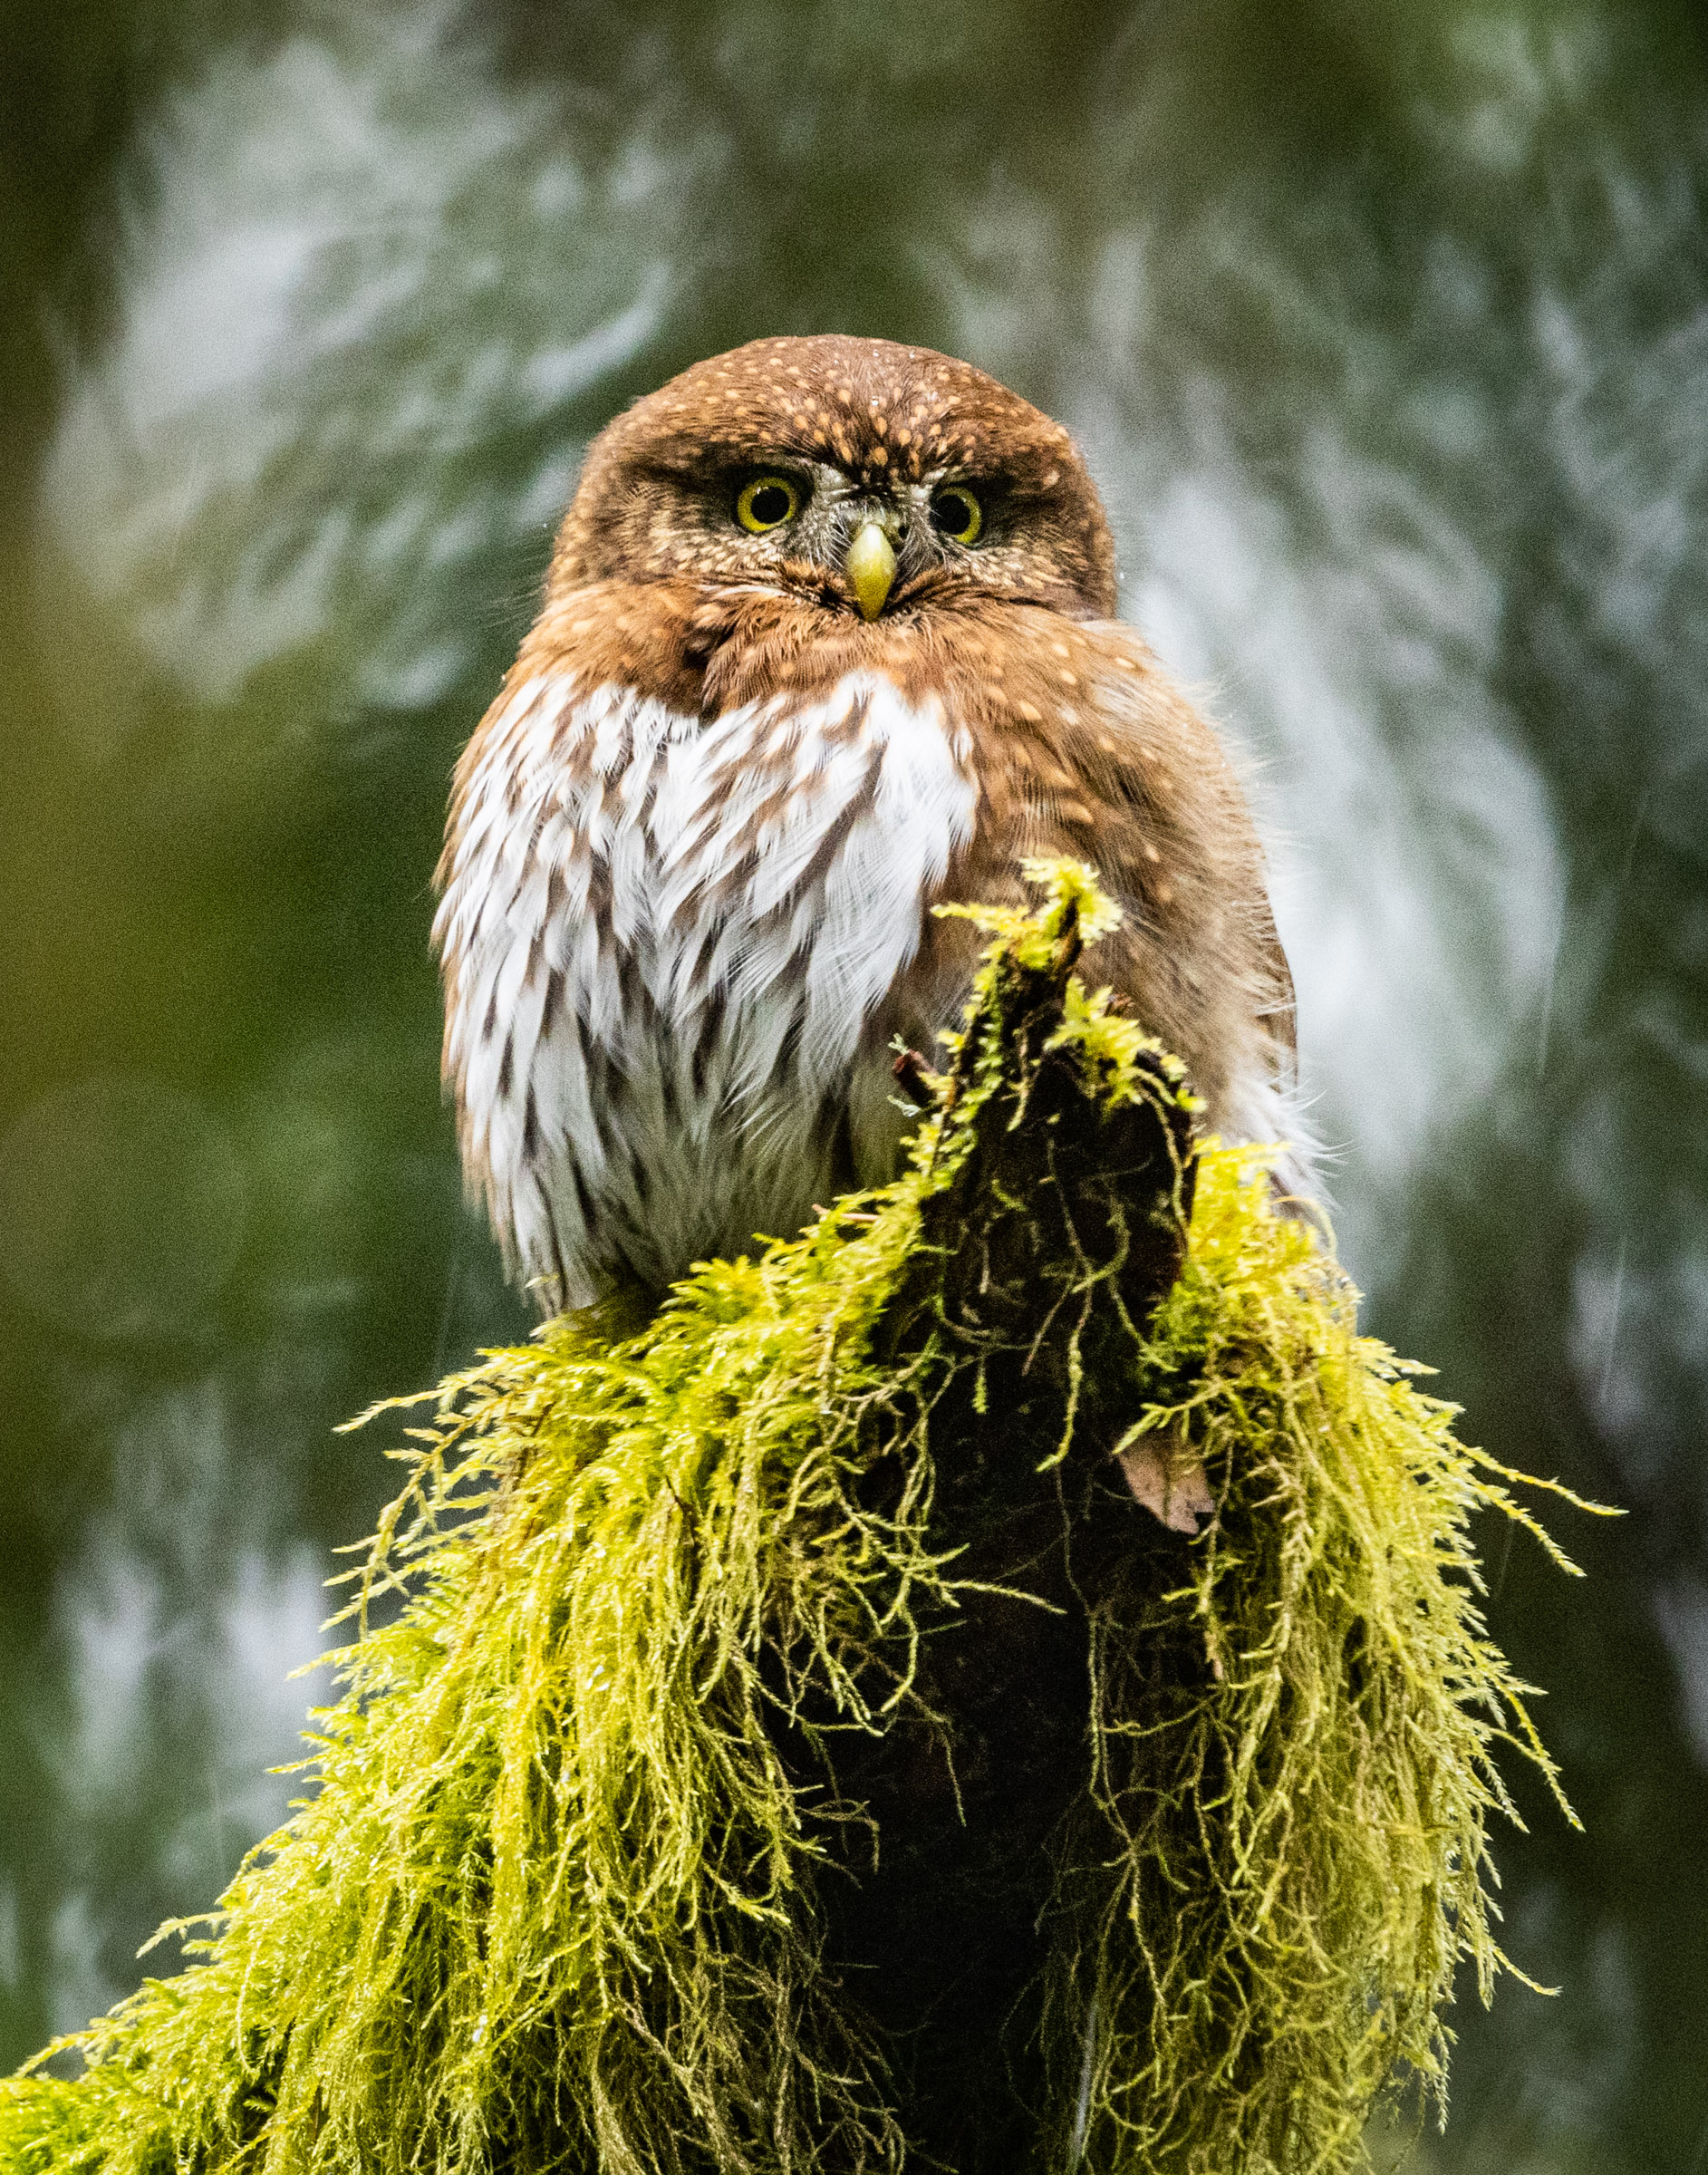
I located this Northern Pygmy Owl with a scan of a large area to the side of a road. It was an unmistakable bright spot in the thermal monocular (In my excitement, I forgot to take a thermal recording of it – sorry), but nearly invisible to the naked eye. It was about 150ft away, and 30ft up in a visually complex environment. The photo is with a 500mm x 1.4x DSLR, so don’t be fooled – the bird was small and far away – hardly a spec in the lush green forest.
Since a thermal monocular is something you only use to locate birds, after you’ve done the locating, you need to switch to more traditional optics without losing track of things. It helps if you can smoothly transition from the thermal monocular to whatever other device you use. While you can just use another neck strap to store your thermal monocular, I’ve found it’s much more pleasant to use a metal clip on the strap of my backpack. I can easily mount or remove the thermal imager with one hand. After a bit of searching, I found this one that I like. (Again, I’m honestly not being paid for this… but I got two of these – second one for my binoculars, and they’re really solid)
One interesting side-note… IR doesn’t transmit through glass. This also means you can’t see IR through glass (such as the window of your car). What you typically see is the temperature of the glass itself. However, you can see IR reflections in glass or mirrors. The lenses of these units are made from germanium compounds. This germanium glass looks black to our eyes, but it allows IR to pass through (and to be focused by shaped lenses).
Conditions Matter
Remember, in order for thermal birding to work, the birds must emitting a different temperature than an otherwise monotonously-temperatured environment. I’m not sure the term for “an environment where all things are at the same temperature”, but that’s what is ideal.
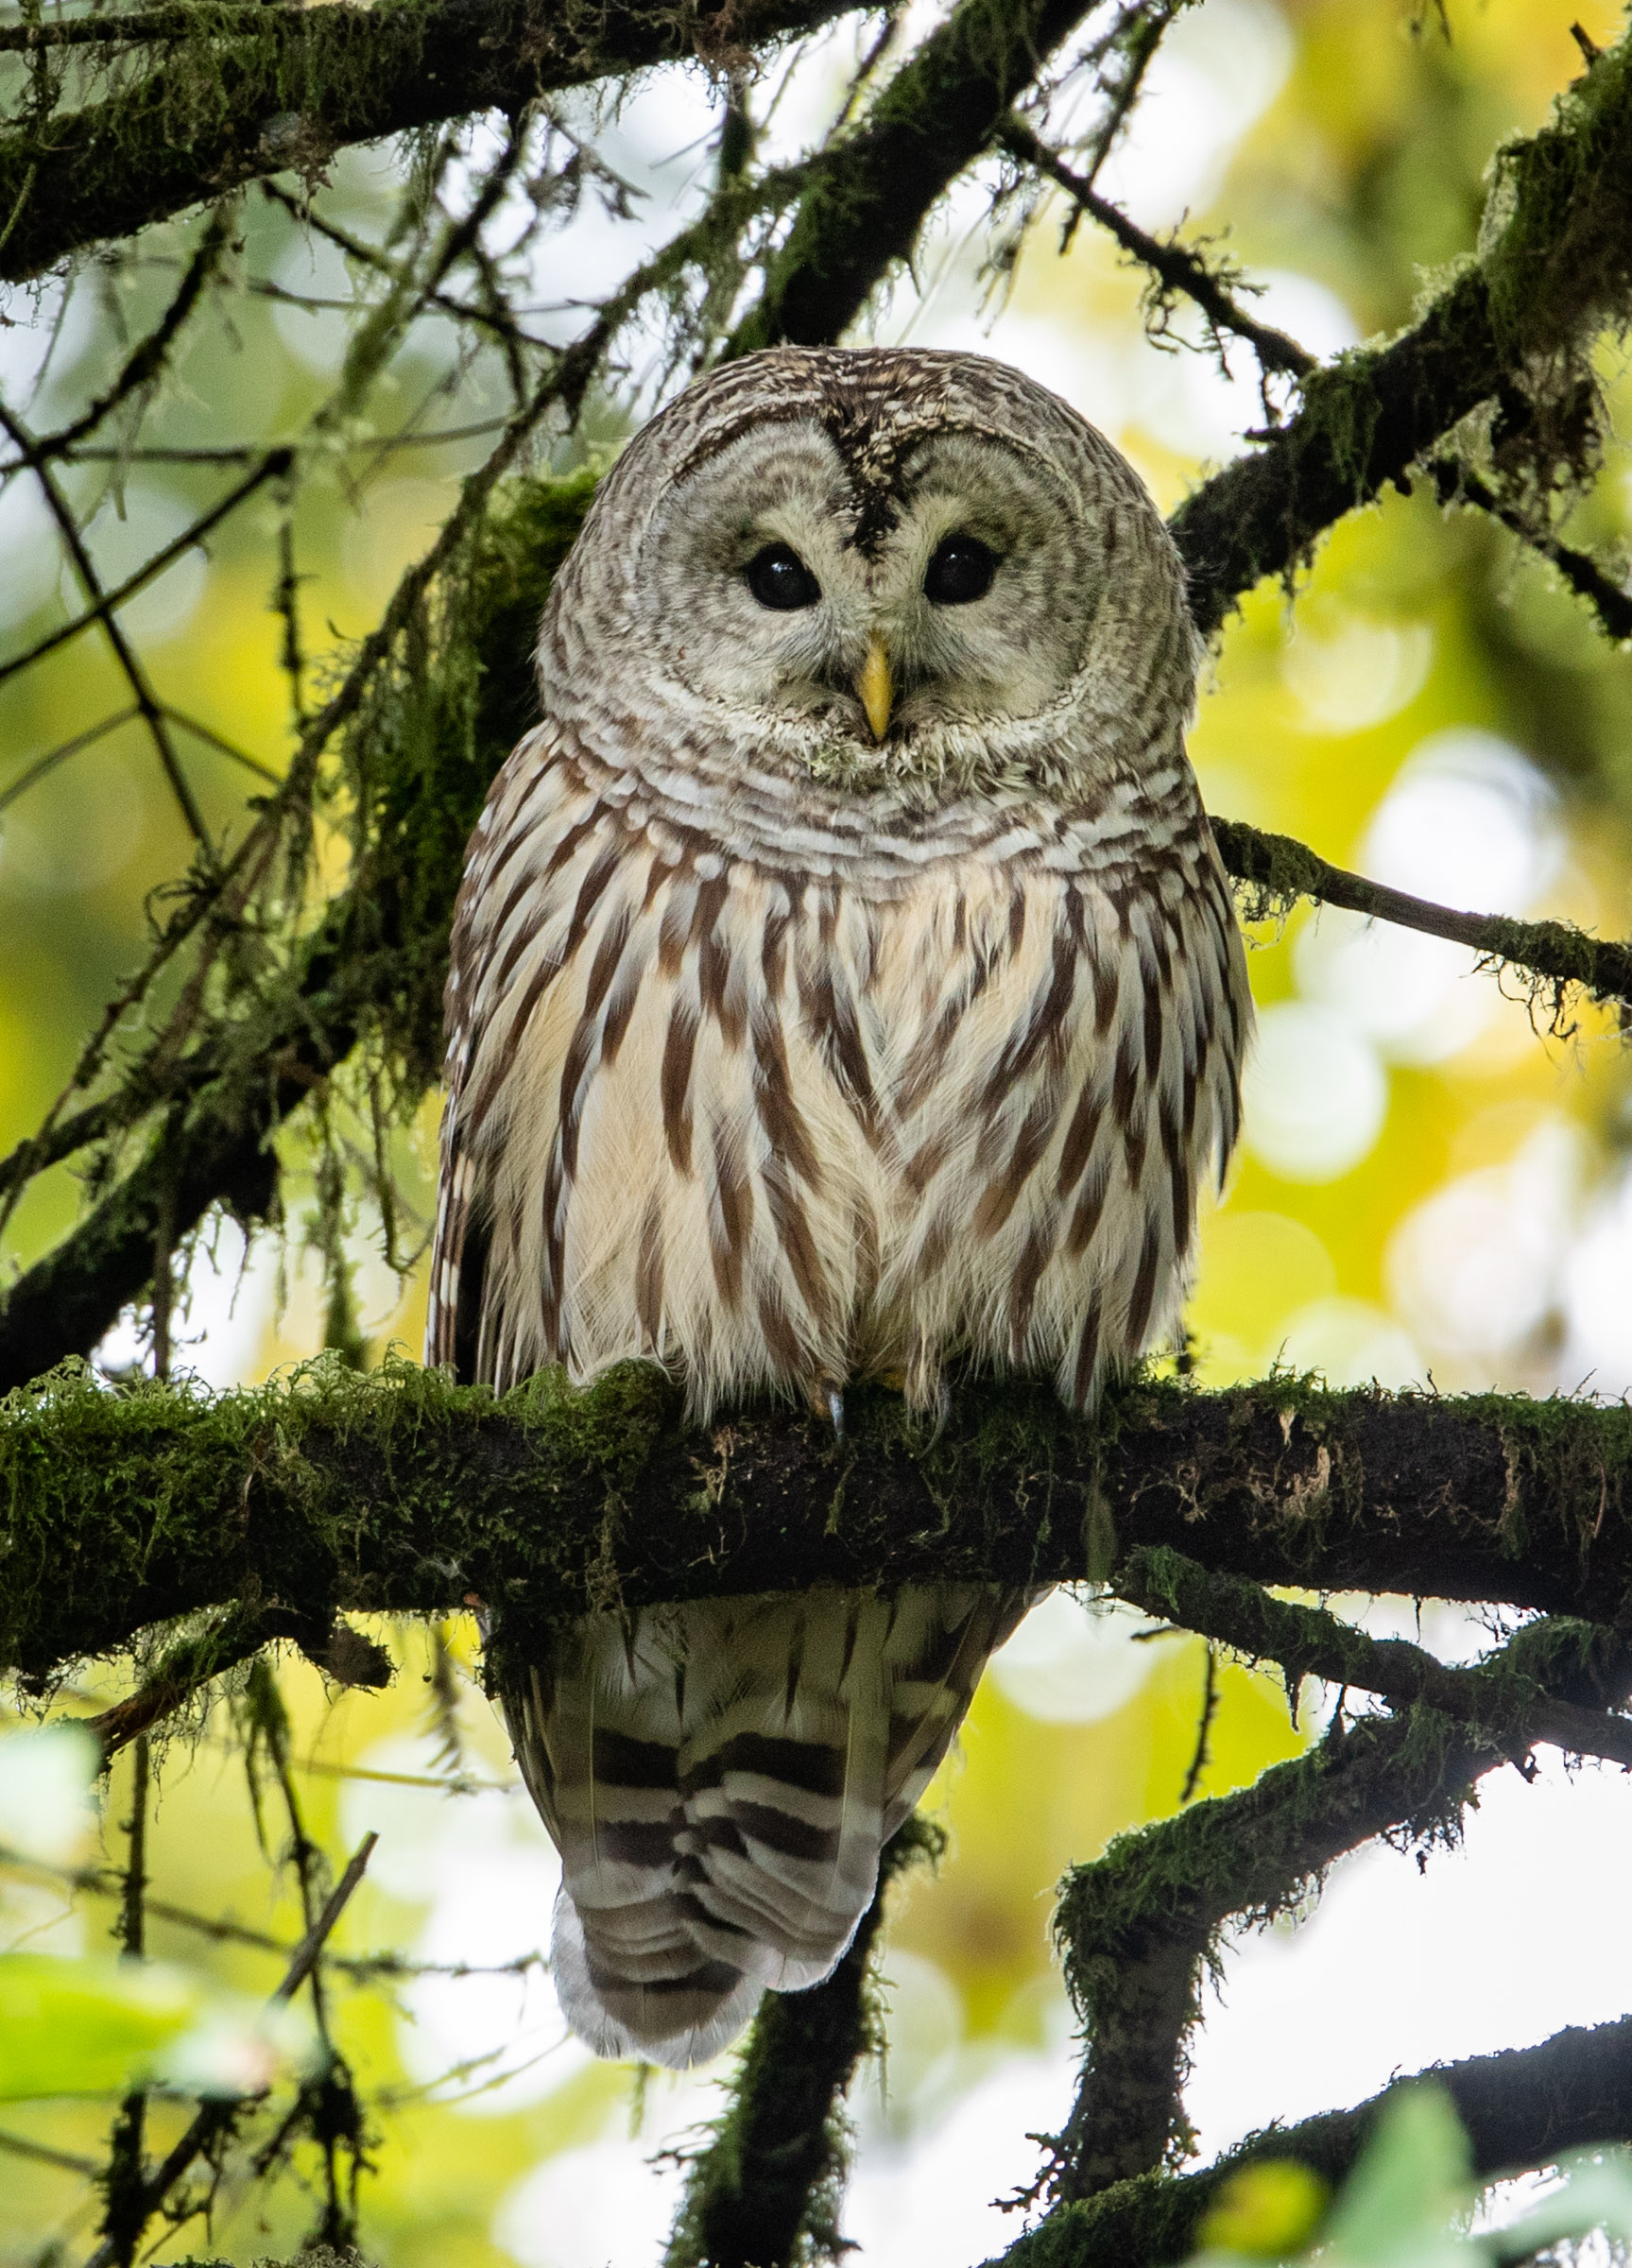
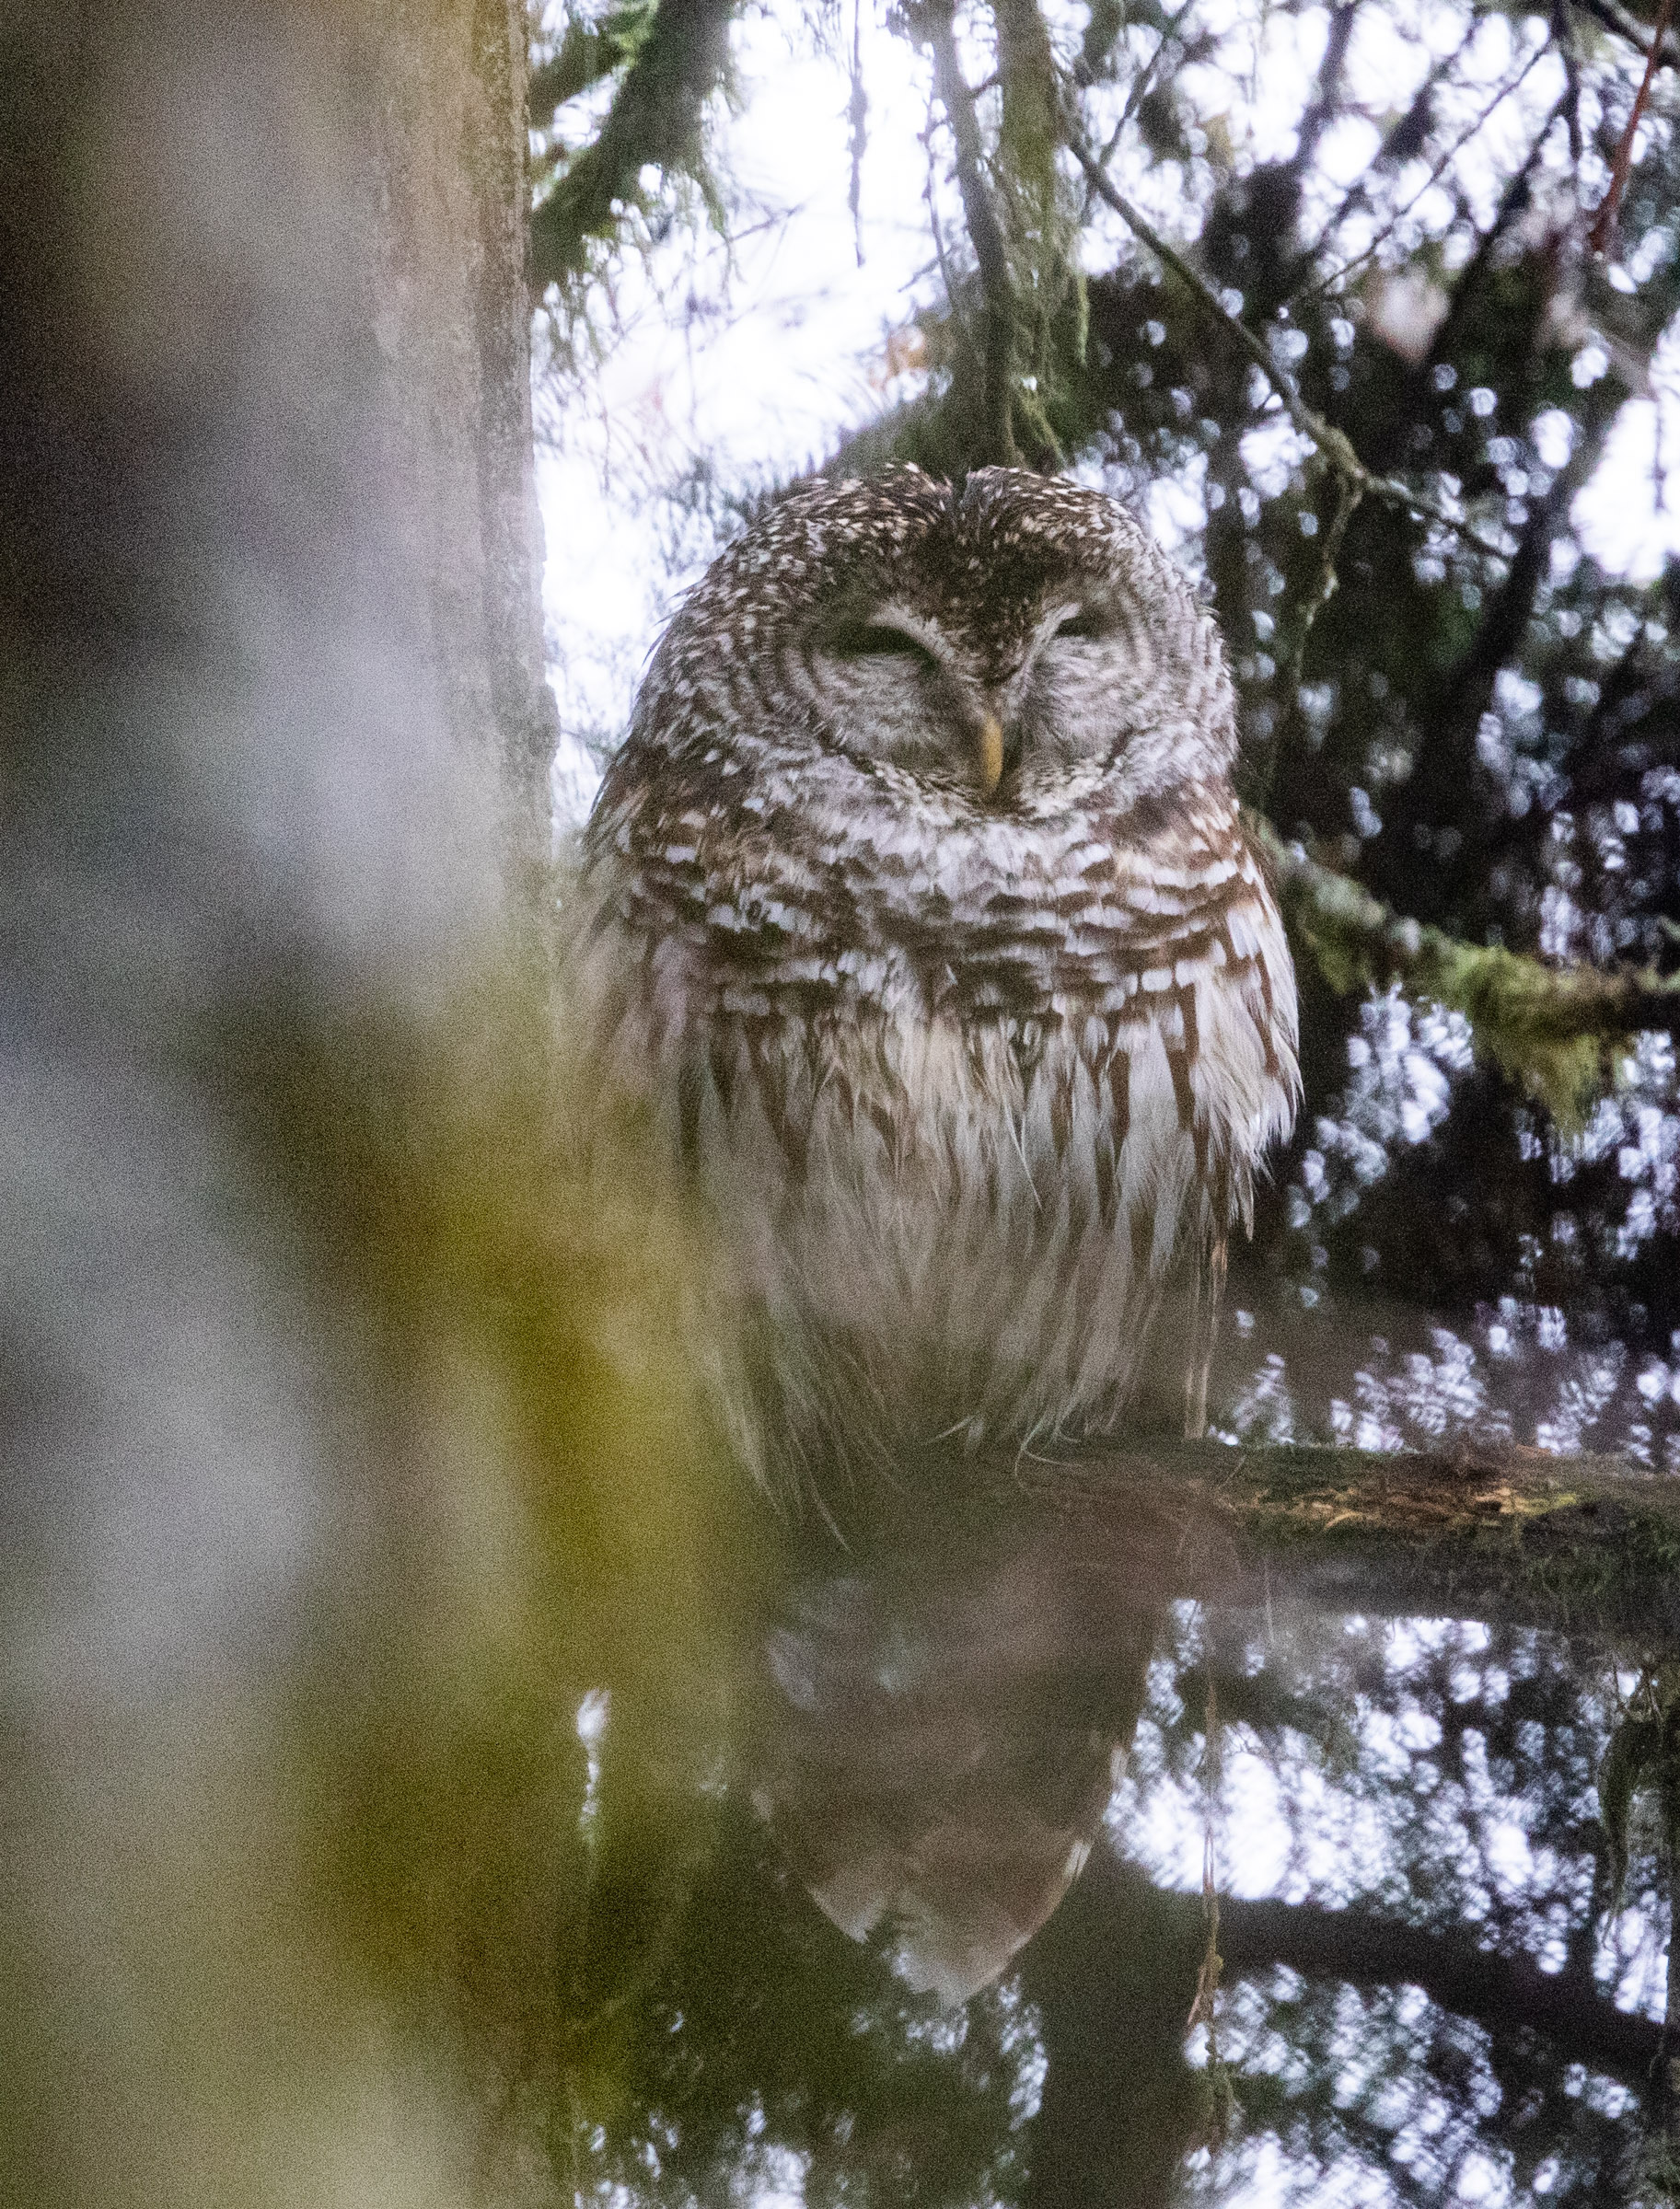
As such, the best conditions for thermal birding are cool mornings and cloudy days. Here in the Pacific Northwest, we have an abundance of that all winter. A cool drizzle is great – everything will be the same temperature as the drizzle, and birds really stand out. I’ve had some of my best observations in a misty drizzle. There is no way I would have seen this Barred Owl behind a tangle of branches in a winter drizzle, without the thermal imager.
IR transmits through raindrops just as well as visible light. An added benefit of a light rain is that it coats everything in a single temperature. Anything warmer really stands out. Dusk can work sometimes, but many things heated by the sun will glow with heat for a while after the sun goes away (such as rocks). If it’s been a hot day, you won’t have very good results thermal birding at dusk.
The worst conditions for thermal birding are bright sunlight and warm days. When the sun is shining on a scene, objects are heated irregularly. Looking at a scene like this through a thermal imager gives you a speckled mess of sun spots. A bird will be just one more speckle, and easy to miss. Better to use traditional optics in those conditions. On hot days, birds are not much warmer than the ambient temperature. It can still work (since birds have hotter body temperatures than any hot day), but the birds won’t glow quite as much.
Here’s a short video I took when locating a Western Screech-Owl with the thermal monocular. This bird was at a known general location, so I didn’t find this particular bird solely with the thermal monocular. But having it did make the search quicker. The owl was in a tree cavity backlit by a bright overcast sky. That didn’t make a difference to the thermal monocular.
Some Observations and Conclusions
All the photos on this page were only possible because of using the thermal monocular – I would not have located these particular birds without it. I’m a moderately-advanced birder, but from what I’ve seen, I think even a very experienced birder – without a thermal monocular – would have had difficulty finding some of the birds in this post, or at least spent more time doing it. It’s very difficult to explain the particulars of each of these sightings – the weather, the scope, the conditions, etc…
The thermal monocular isn’t magic. I’ve spent a ton of time looking at nothing. I’ve scanned miles of forests up and down across and back, till my battery ran dry (a few hours of active use), and come up with absolutely nothing. But I like to think the thermal monocular helped tell me there was indeed nothing to see, and I was able to be more efficient with my time.
I’ve also learned there are more mice roaming the forest floor and bushes than I thought – especially at night.
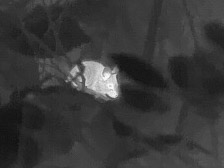
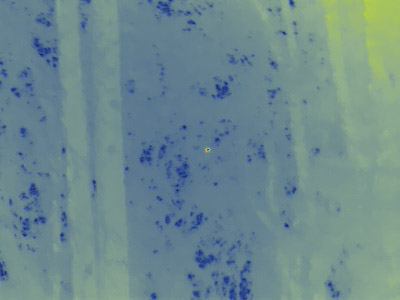
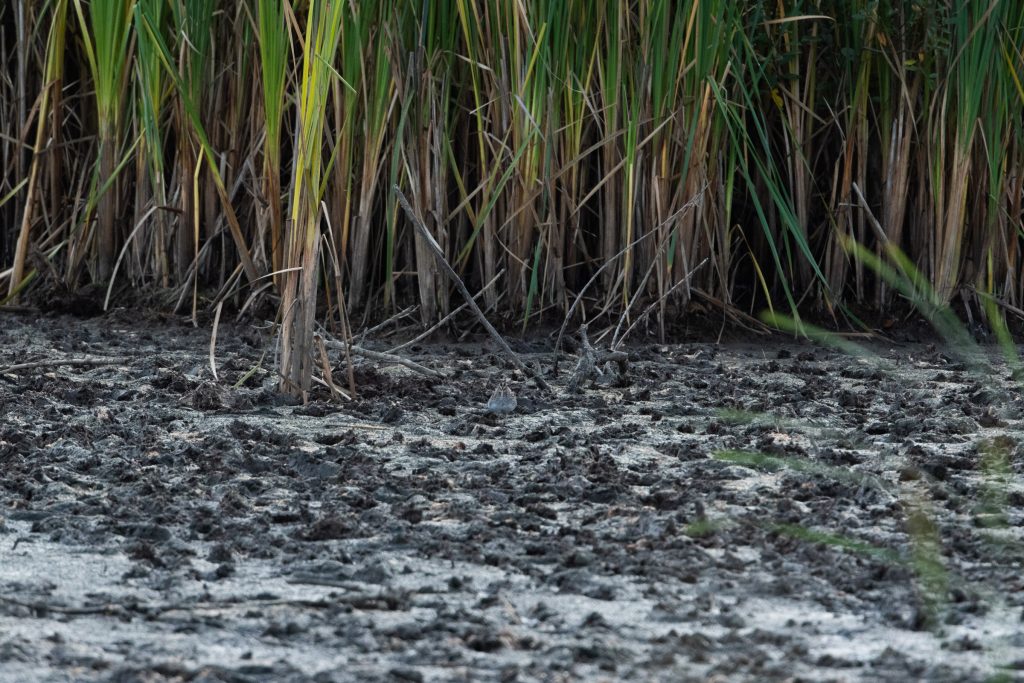
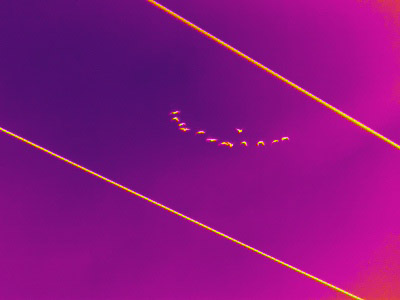
I was recently at a wetland looking at a nondescript mud flat. A cursory look didn’t show anything. But with the thermal monocular, I was quickly able to spot two motionless Wilson’s Snipes. I might have located them with traditional optics, but it was far quicker with the thermal monocular. Here’s an uncropped image of one of them – can you spot the bird in the center of this image?
On a couple occasions, I’ve seen a soft glow coming from a crack in a the trunk of a crooked old tree. I have no idea what was living in there (probably a mouse), but there clearly it was something. The same thing goes for squirrel nests and some ground holes… walking through the local park at night, riddled with vole holes, is interesting with the thermal monocular.
Another good location is a stubble field or grass field, where birds blend in. I was in Chicago in the winter, and spotted a deer in some dead prairie grass (about 4-6ft tall) the deer’s head was clearly visible with the thermal monocular. However pointing my binoculars at the exact location yielded nothing other than grass. It blended-in that well. I’ve spotted a Black-crowned Night-heron the same way – it was in such thick grass, I never would have seen it otherwise, but the thermal monocular showed a heat source, so I spent more time on the area and found the bird.
I’ve spotted numerous birds (such as Varied & Hermit Thrushes) which sit motionless behind tangles of branches in the deep forest. Sometimes I’ve had a really hard time finding the bird with my binoculars even when I know exactly where it is by looking through the thermal monocular. The thermal monocular is just picking-up bits and pieces of the bird, but it’s clearly there.
Since my thermal monocular is rather “zoomed in” (has a longer focal length, and narrow field of view), it requires manual focusing. But, I’ve determined that I can set the focus to a distance about 100 yards out, and get good results. It doesn’t matter if birds closer-in are blurry… they still glow.
Interestingly, the surf on the ocean is slightly warmer than the water underneath. This doesn’t affect results too much – I’ve found the thermal imager is not too useful over the ocean, since you can see most birds pretty well with your eyes, plus the birds that live on the water tend to be covered in the cold water – obscuring them from view if they’re at all wet. But I’ll keep experimenting with it.
A few notes from a trip to Texas
I brought my thermal monocular with me on a trip to the Texas gulf coast in late-April / early-May. The short story is – I found it very useful, more than I’d anticipated. But, in line with my previous experience, it was only useful in cloudy conditions (or in the dark & pre-dawn). It was warm during this trip, but not scorching hot – with moderate humidity and temps on cloudy days in the high 70s.
My perception was that the humidity kept the temperatures of the objects I was looking at (trees, grass, bushes) a consistent temperature. Though, even without humidity this is generally the case – temperature equilibrates. It just seemed the humidity had stronger impact in moderating temperatures – again just a perception, I don’t have data on this.
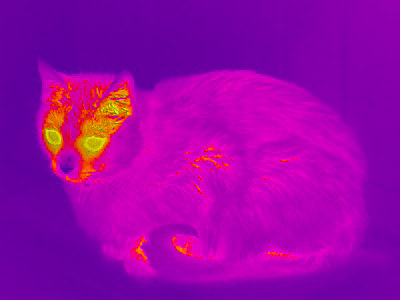
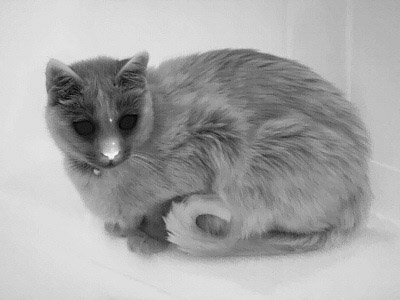
Birds are still substantially warmer than 80F. So with the environment all at a similar temperature, the birds stand-out when observed with the thermal monocular. My thermal imager is sensitive enough to see the afterglow of my cat’s footprint on a cool tile, so it can pick-out the difference between a bird and slightly cooler plants.
As for actual results with the thermal monocular? Well, it’s a lot like birding in general. I looked at lot of bare trees, and undergrowth, and wetlands. A lot. And I saw mostly nothing. Though, this was ok – it was a quick way to scan a scene and make sure I wasn’t missing anything. But every so often, I found a bird with the thermal monocular I wouldn’t have otherwise spotted.
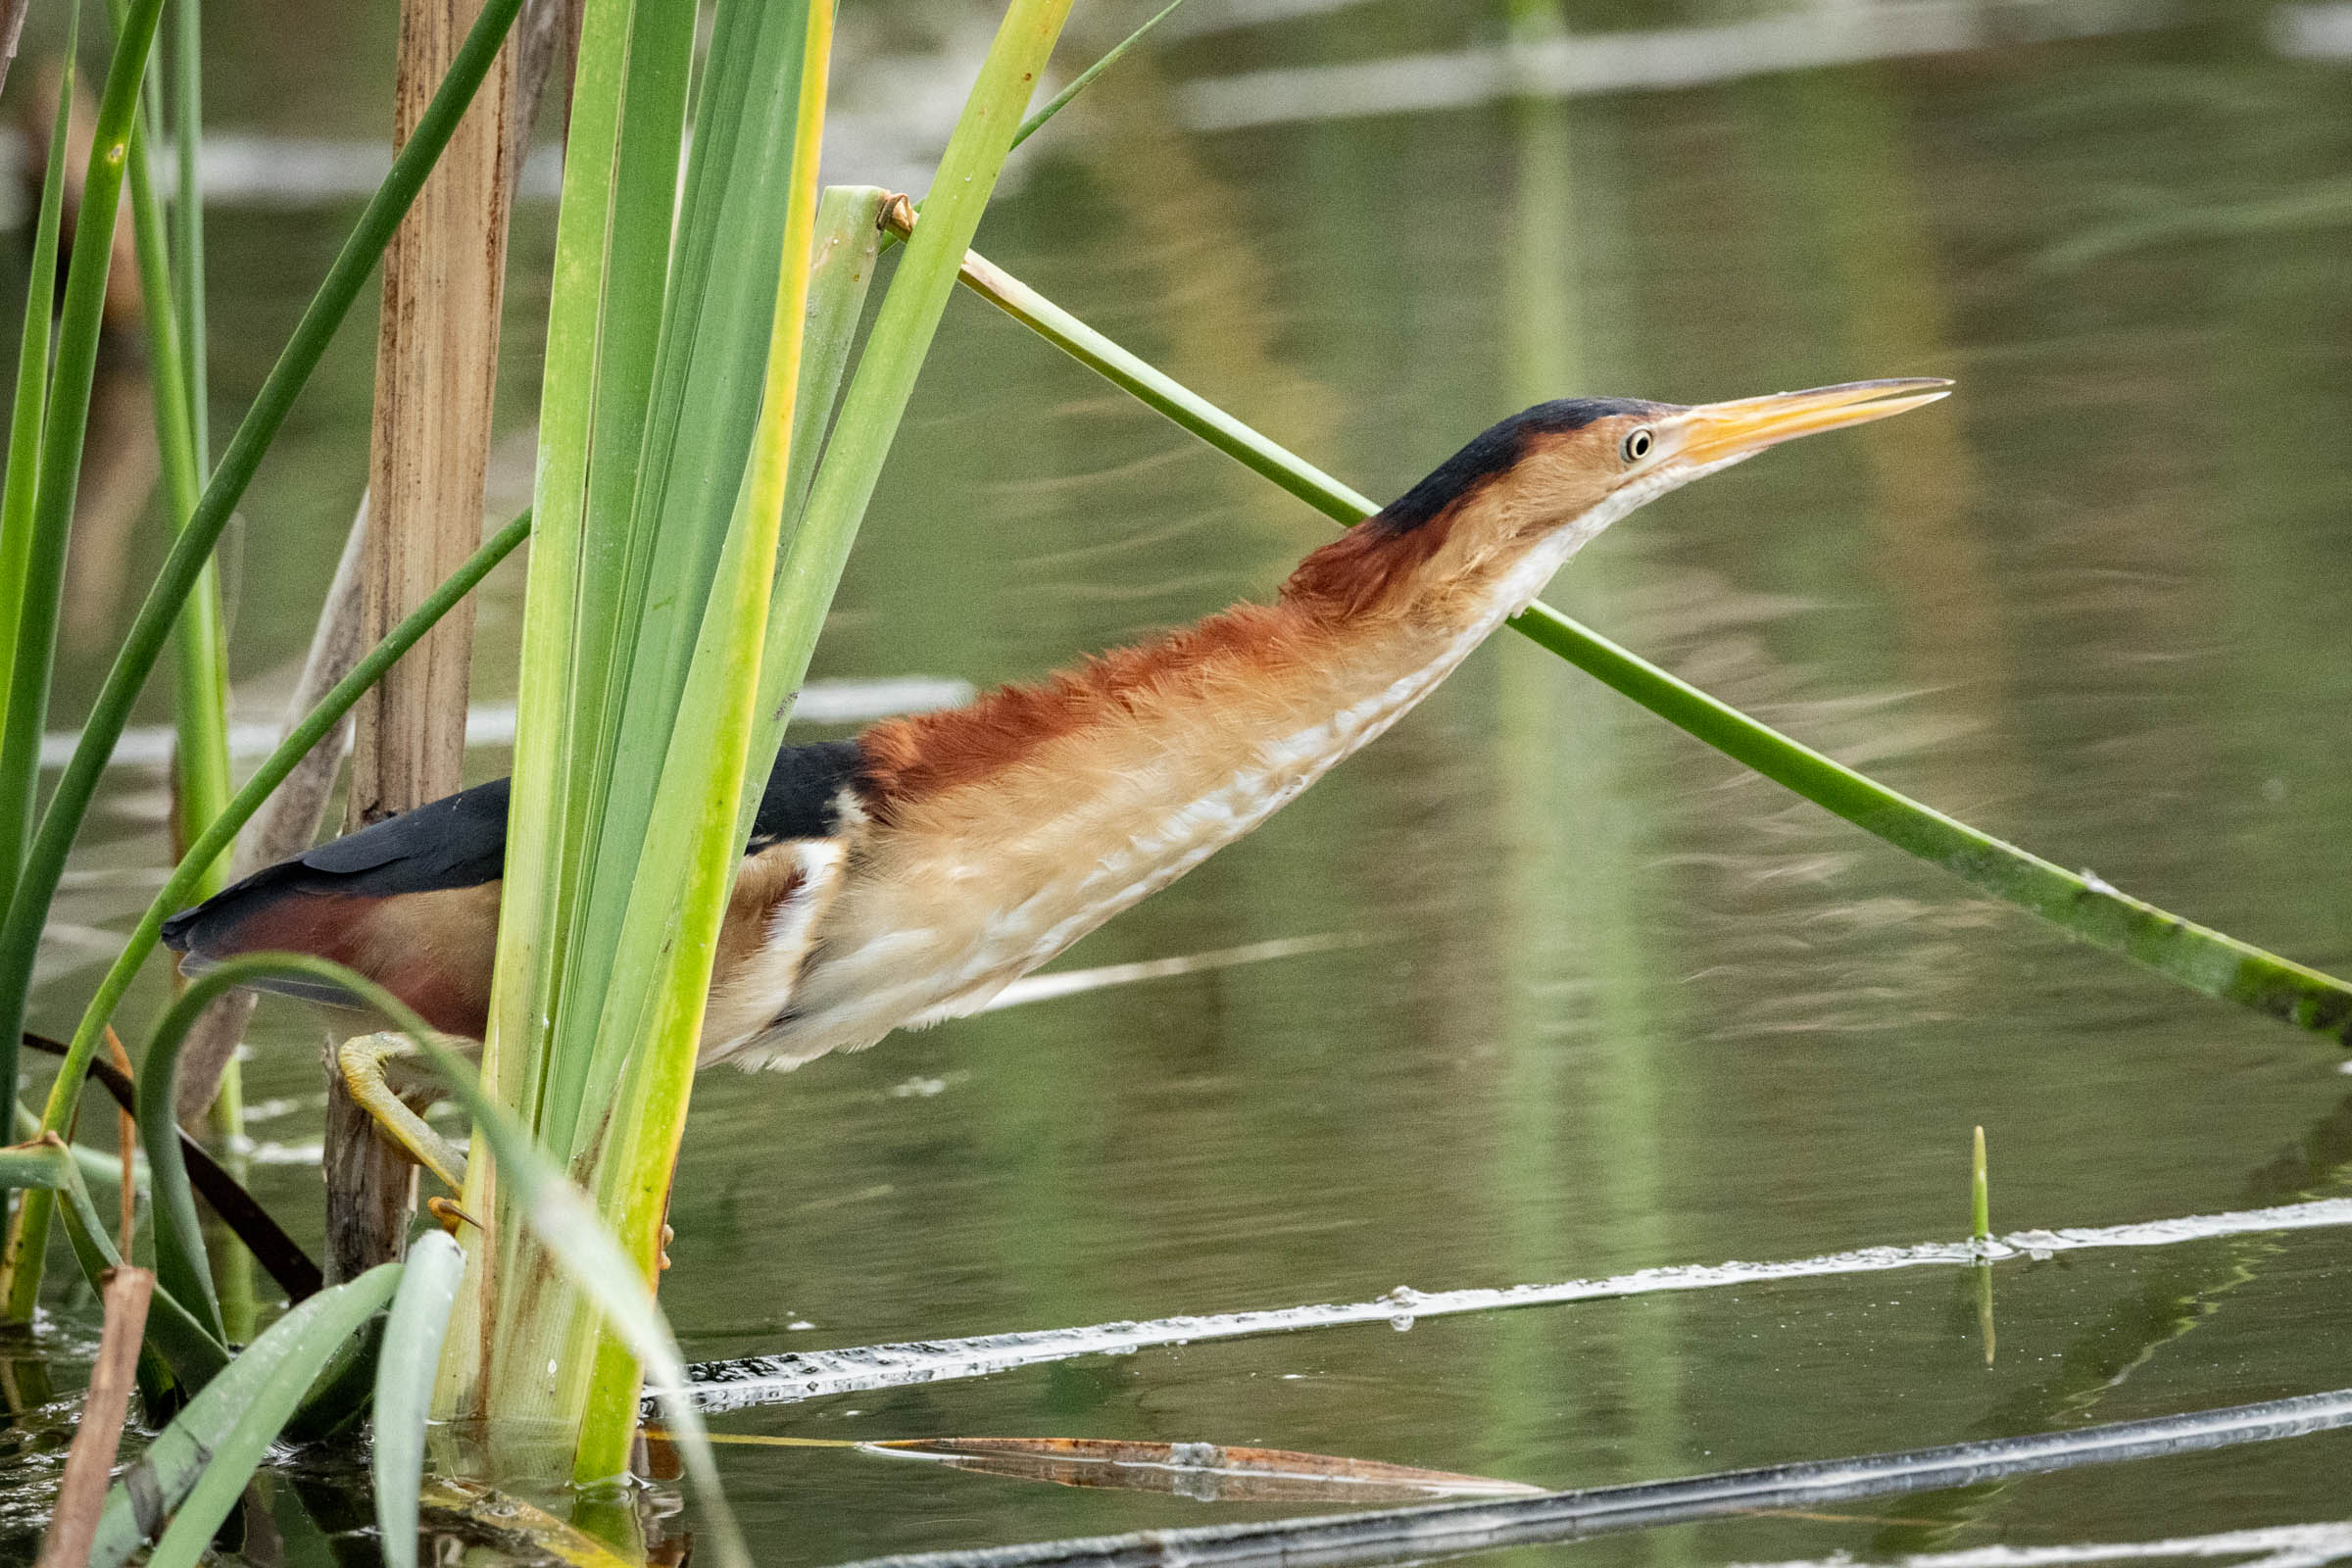
One of these was this Least Bittern. I saw 3 Least Bitterns on the trip. One was plainly visible, but the other two I first saw with the thermal monocular. Without the thermal imager, I surely would have passed-by this particular bird. It was mostly hiding behind the reeds when I first spotted it with a thermal scan. 30 seconds later, it started to zoop… and zoop… and zoop, until it looked like this.
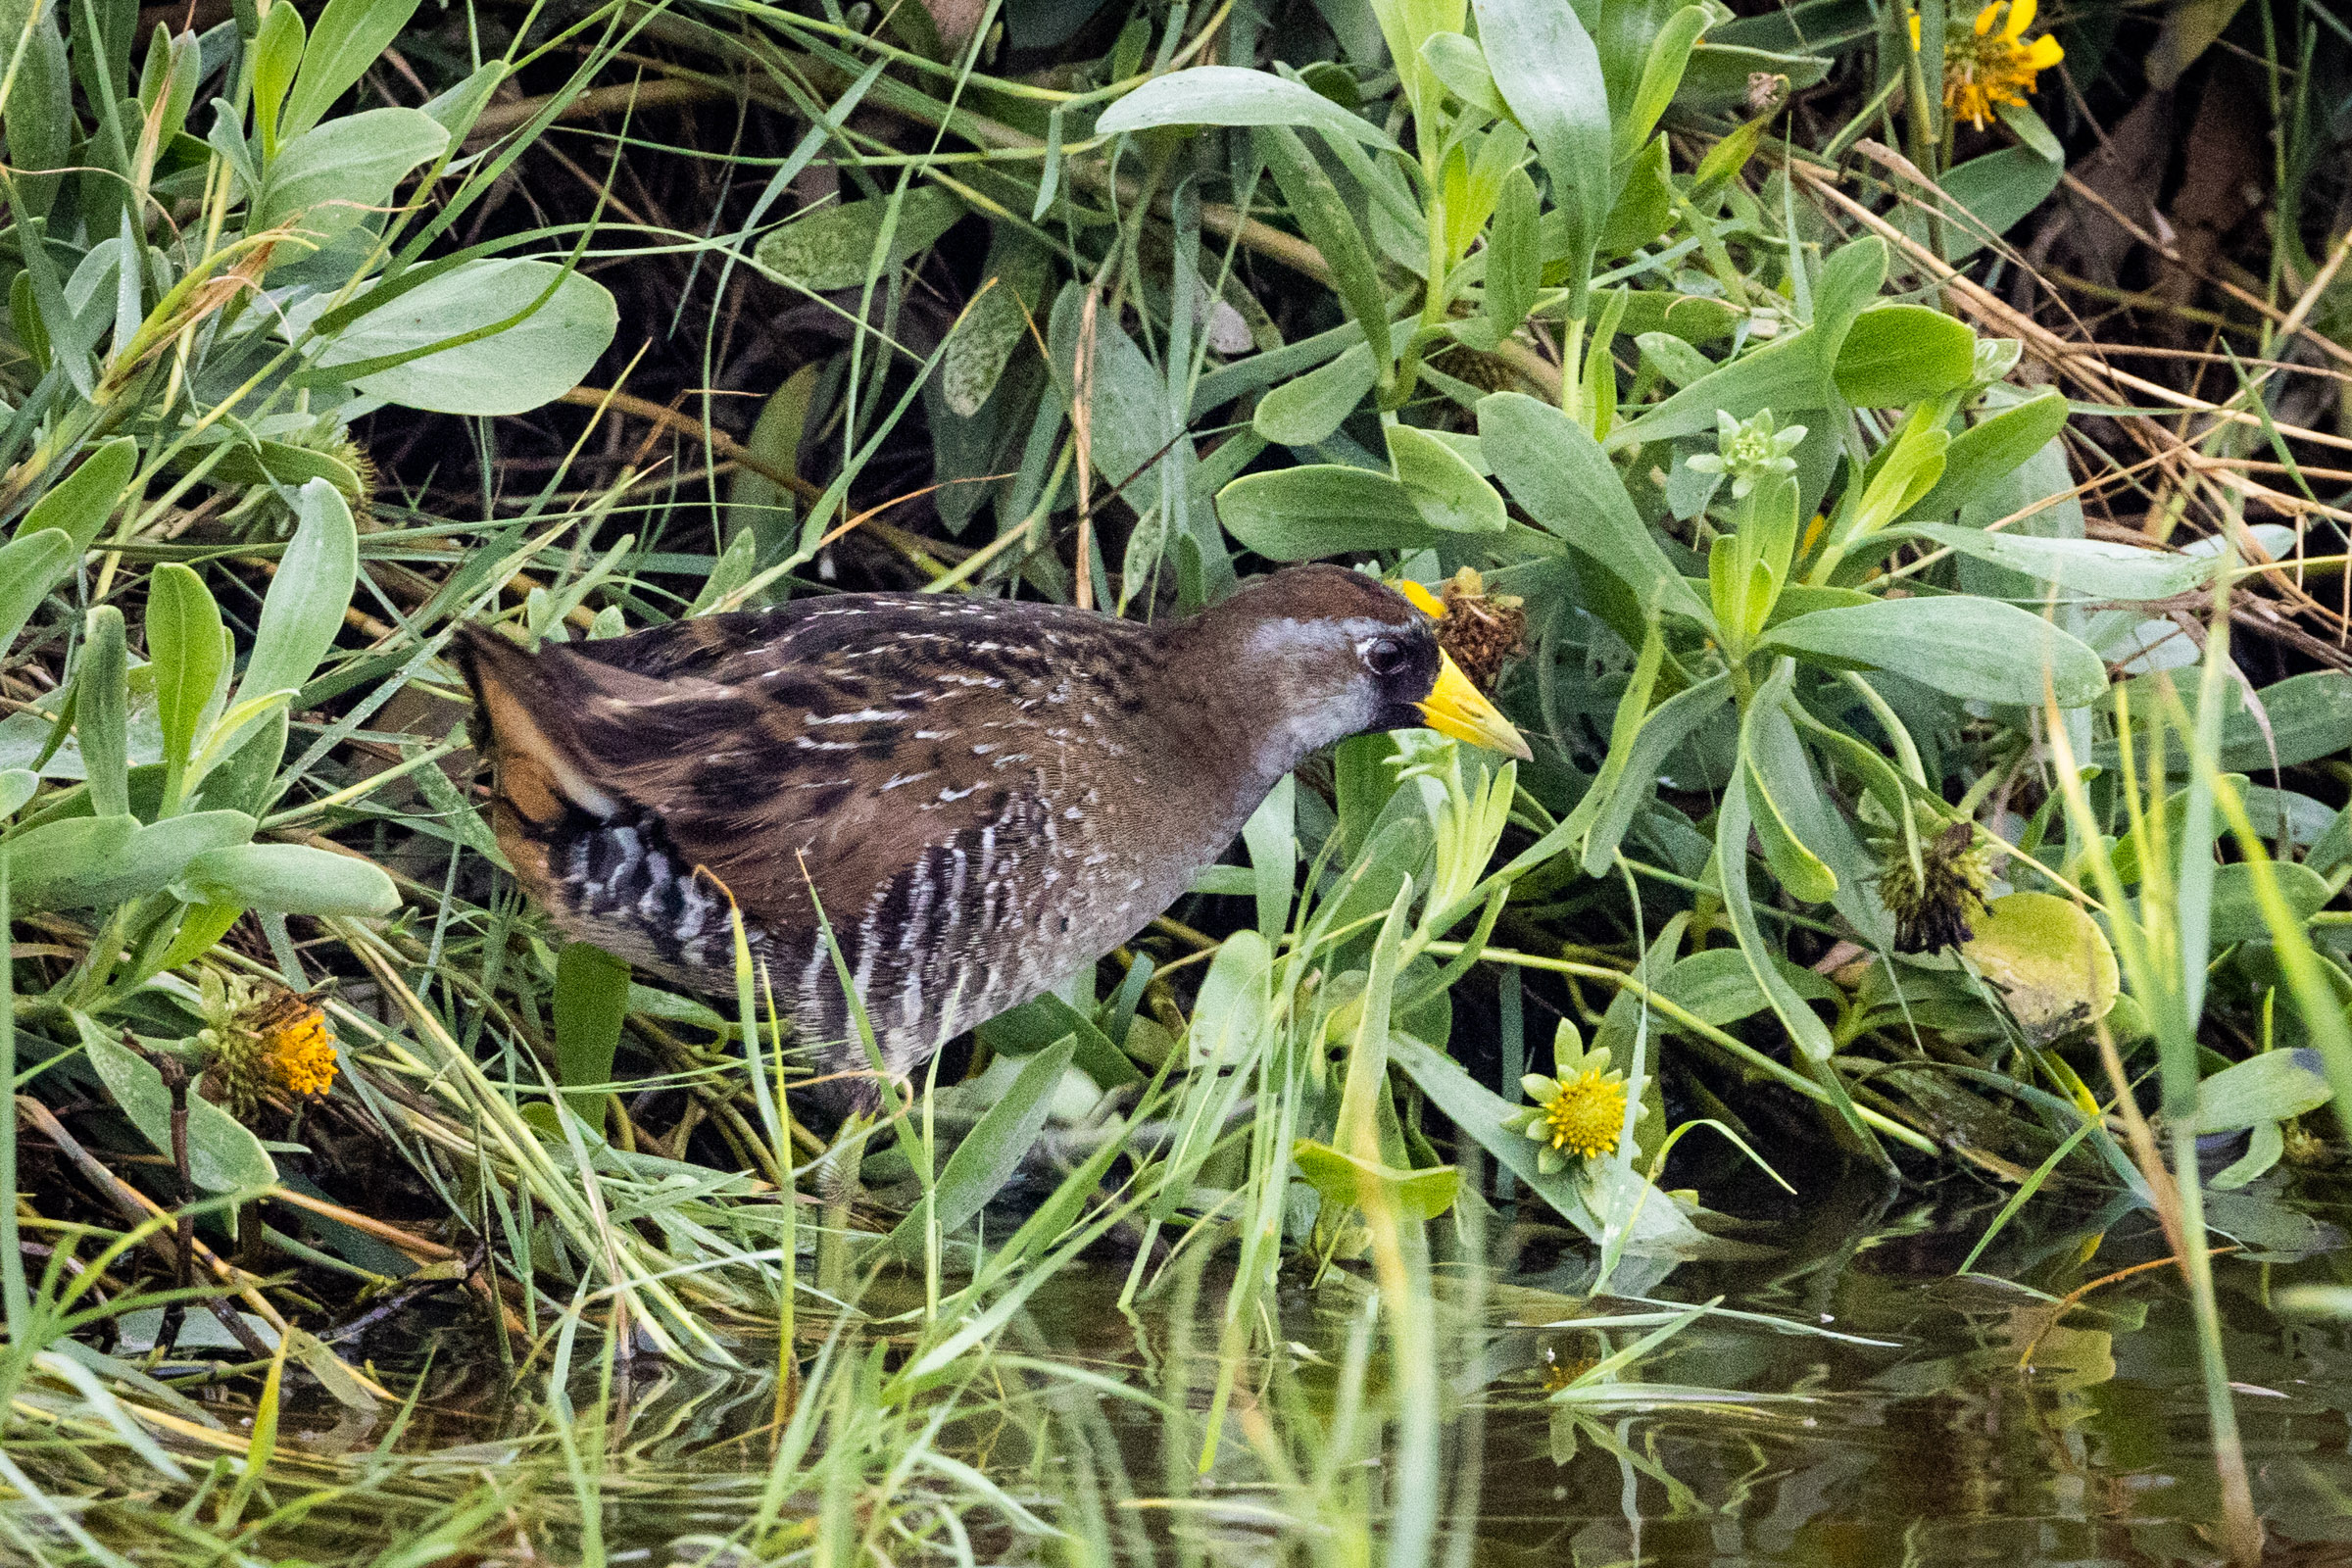
I also found this particular Sora with the thermal monocular. I found other Sora without it, and I found other Sora with it. But this one was both “found with the thermal monocular” and resulted in a decent image. It might look obvious, but when I first saw the bird it was obscured.
But surely the highlight was a Common Pauraque at Estero Llano Grande. These birds are known to roost at a specific area in this park. But I didn’t know where that area was. I narrowed it down using a little deduction (noticing a bit of trail was roped-off for no apparent reason… possibly, it was to protect the birds?) I stayed on the open part of the trail, and quietly peered into the undergrowth. This video is what I saw:
The video makes it look obvious. But this scene was a mess of branches and bushes and leaves all the same color as the motionless bird. There was only one very narrow window where a view of the bird was unobstructed. This photo is from that one angle.
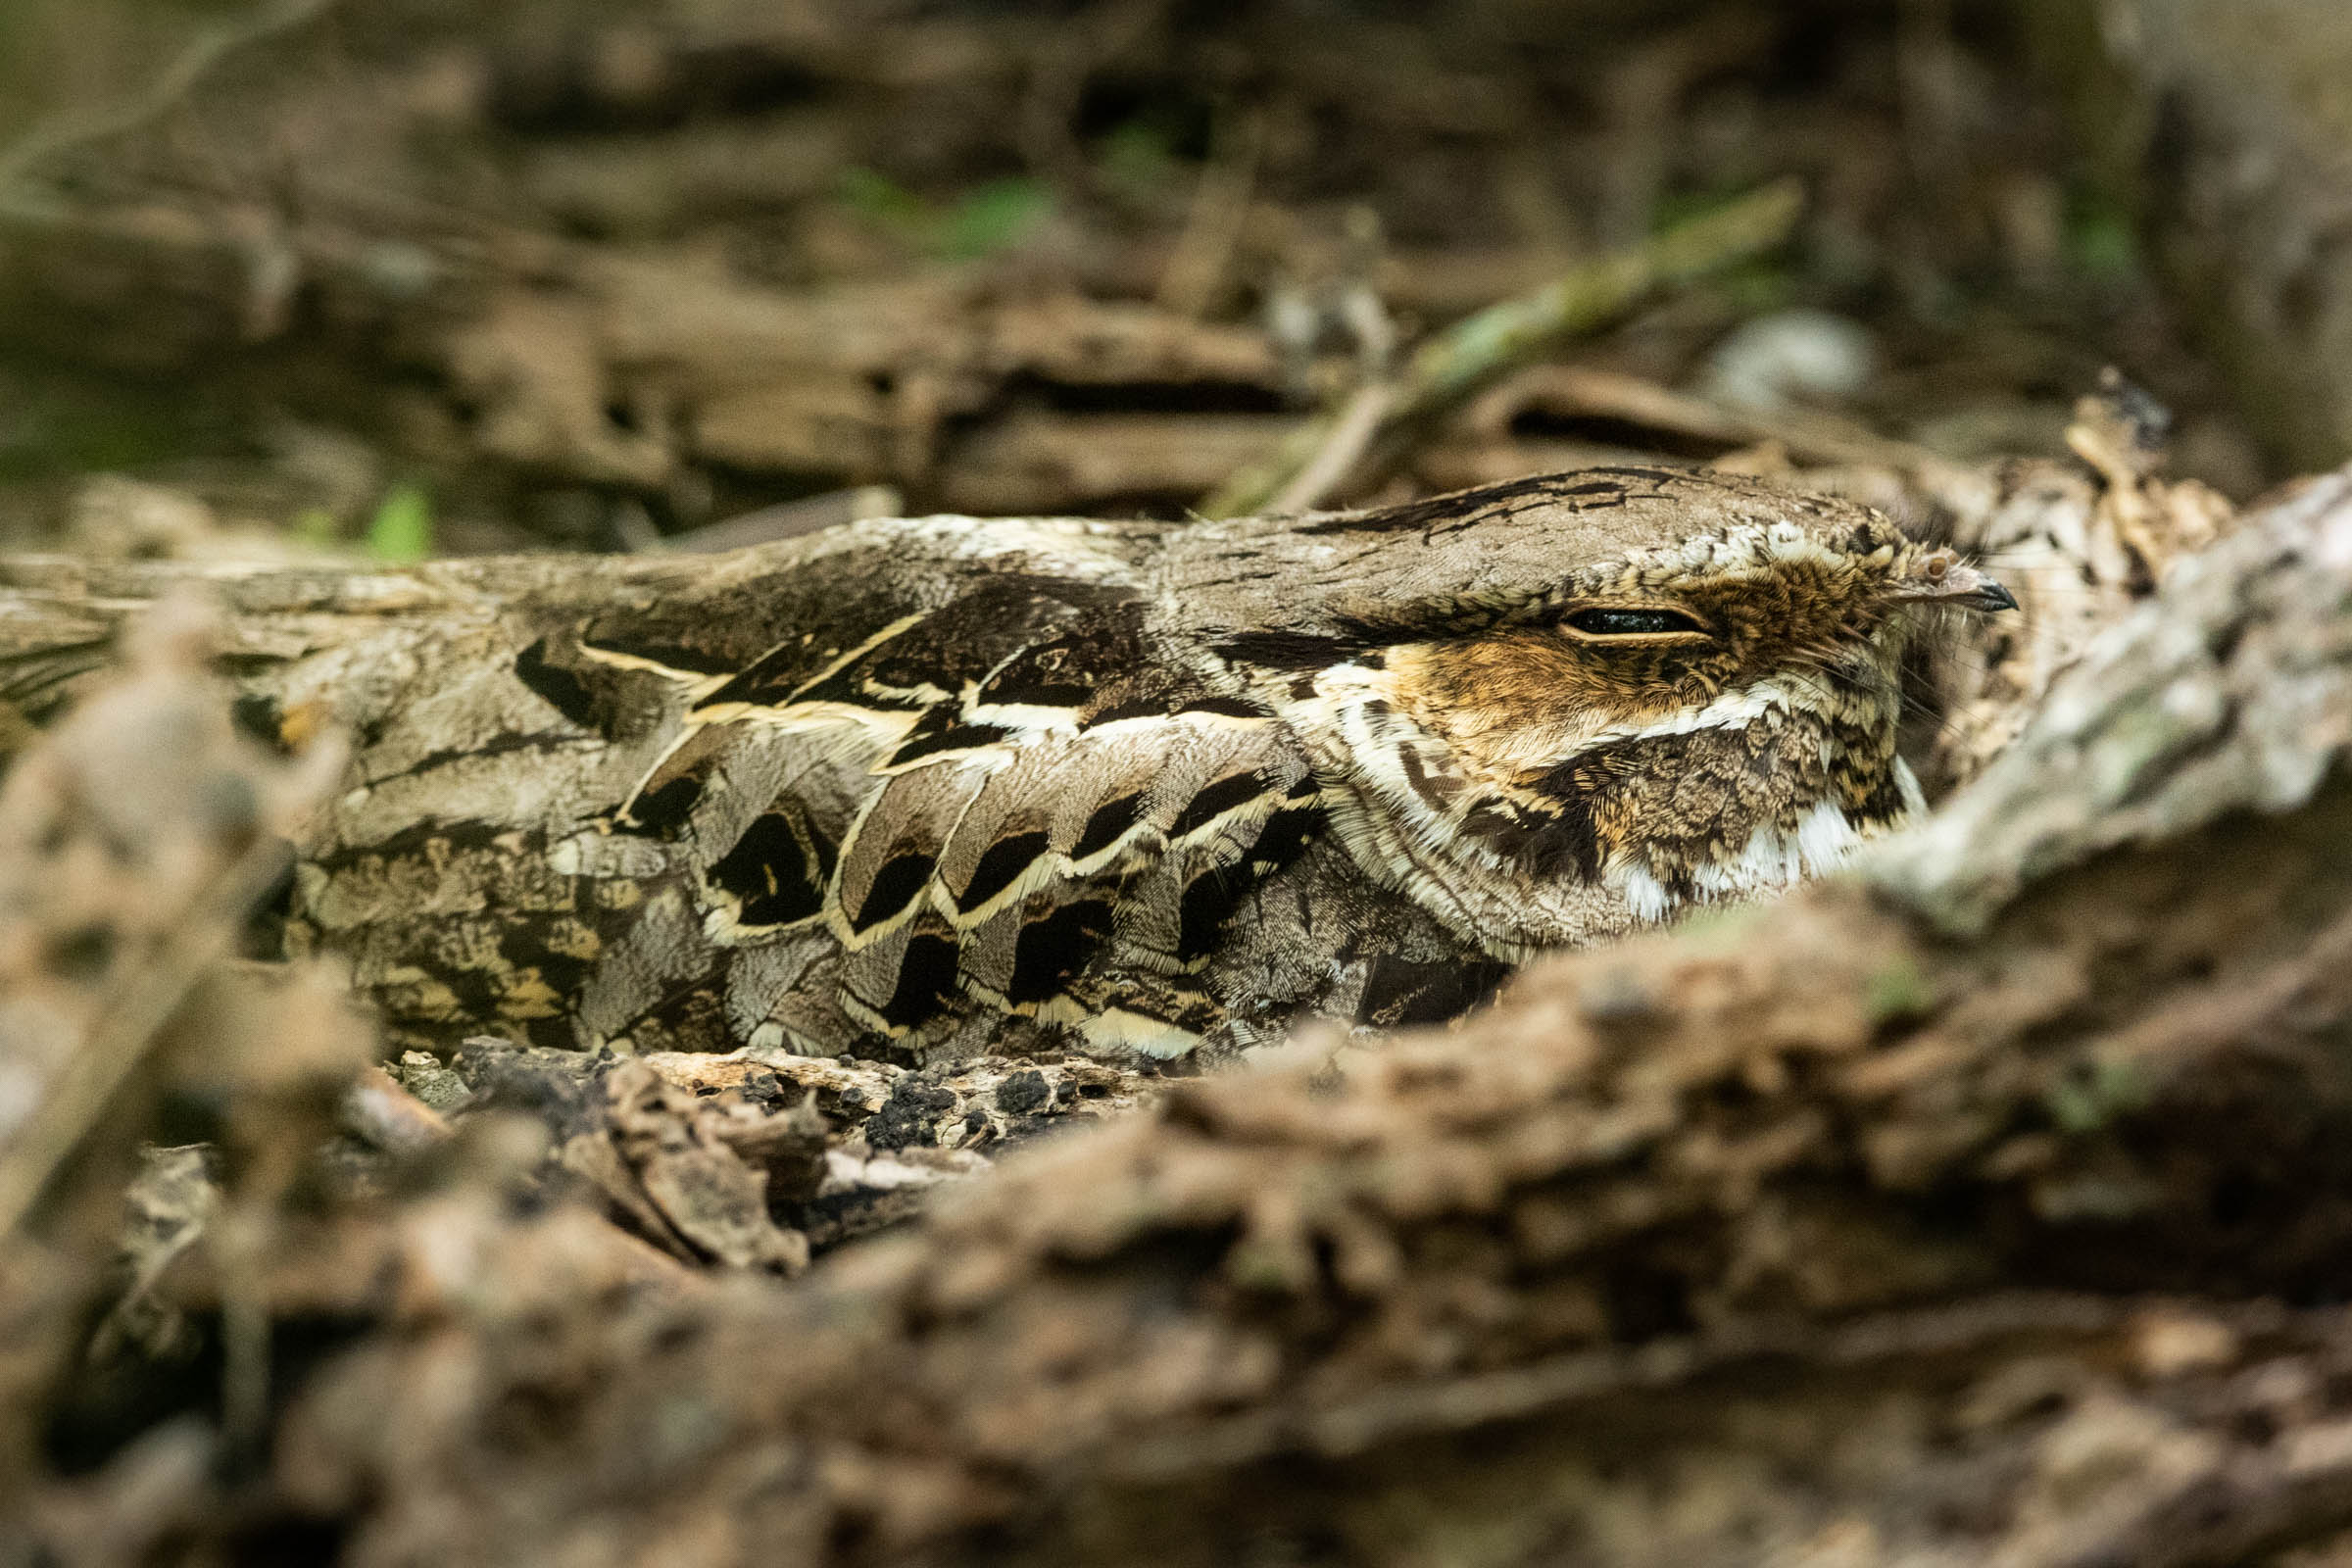
The bird was completely unfazed by my presence. I was a good distance away, and didn’t linger.
Closing Thoughts
I really feel that in the future, thermal imagers will be an indispensable “tool in the shed” of committed birders. This technology is different than anything in our historical tool box. To get the most out of it, It helps to have experience both with birds and the device. But once you have that, there are moments when it seems like magic. The birds just appear. The bonus is that this technology is completely passive – no lasers or lights, just observing what is already present with a different set of eyes.
Extending one’s visual range is fundamental to birding – that’s what binoculars and scopes are. Extending one’s visual range into the infrared spectrum is just another aspect of that. All life is lived on the edge of the future, and a view from the edge is often the most spectacular.