I produce a complete set of annotated maps covering the entire CDT, including many alternate routes. These maps are primarily intended to be printed. Though, thanks to Avenza you can now use them with a mobile app as well.
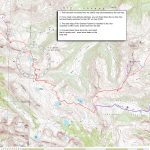
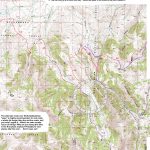
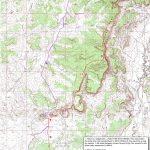
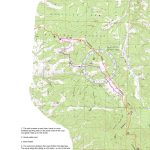
The maps originated with my own 2001 thru-hike. Since then, I’ve updated them every year based on feedback from the previous year’s hikers. The maps have grown and evolved into a unique crowd-sourced collection with many layers of information. Here are a few example pages:
The maps are delivered as high-resolution PDF files. In total, there are about 296 individual maps.
The individual maps are scaled to be printed at 7in x 10in on an 8.5in x 11in sheet of paper, which puts the prints at a scale of about 1:60,000, or 1 mile per inch. All of the information from the 1:24,000 original maps is there, it’s just shrunk into small fonts and tiny lines. Some people have printed the maps on 11in x 17in sheets of paper. This will make some of the fine detail a bit easier to read. Though, I like the 8.5in x 11in size – folded in fourths, it fits perfectly in a pocket (and is a bit lighter for all you lightweight folks).
The base layer of the maps come from USGS 7.5 minute (1:24,000 scale) topographic quads. I’ve drawn the trail with a red line & a bunch of alternate routes in purple. I’ve added a bunch of notes to the maps based on feedback I’ve received from dozens of hikers through the years, and many other sources. If you have any corrections, comments or notes to add, let me know – that’s exactly how it all works. We all owe a debt to the people who walked before us, and pay it back to those who follow.
Getting your own copy
In an effort to be kind to my server bandwidth, I don’t have the download links published, but just e-mail me: jonathan@phlumf.com and I’ll send you the links. The entire download is about 2GB.
If you don’t have a good internet connection/bandwidth, I can mail you a physical DVD-ROM, just ask.
The maps are free of charge. I know a lot of CDT hikers are under serious budget constraints, and I get a lot of intangible rewards for doing this. But if you like, I do appreciate anything you can send back to me to cover my expenses & encourage me to continue to do this. If you want to send me paypal, you can use paypal.com to send something to: jonathan@phlumf.com. Or just e-mail me for my mailing address.
About the Updates
I generally update the entire set of maps over the winter, and try to be done by the end of February. If you want the current year’s maps, just ask for it. If you want to be notified when the next update is available, send me an e-mail and I’ll add you to the list.
I do not keep a log of exactly what’s changed on each map each year. Sorry about this, it’d just be too much work to deal with. I update the maps in a bit of a haphazard fashion based on numerous (sometimes conflicting) inputs, so it’s just too much to track. If you have a set of maps from 1 year prior, you’ll probably be OK. Even a couple years back, and you’ll probably be OK, but you might miss-out on some new routes and details.
About the 2020 update
The 2020 update is now available.
The 2020 update is very minor – just a few maps in Montana and New Mexico have changed vs. 2019. The CDT has stabilized somewhat in recent years, which makes navigation easier than ever (but don’t worry – there are still plenty of crazy alternates to suit every whim!).
The Map Files
- The map files are in .pdf format for easy printing. You can also download the maps to your mobile device with the Avenza app – more about that below.
- Each .pdf file contains from 4-15 maps, completing a logical section of the trail. There are a total of 38 sections plus an overview, so 39 .pdf files..
- Nearly all of the maps are based on the USGS 1:24,000 or 7.5 minute map data. A few maps in New Mexico are based on 1:100,000 USGS data. Those maps are labeled as such, and it should be obvious when you look at them.
- When printed on 8.5in x 11in paper, the maps have a scale of about 1mile/inch, or roughly 1:60,000 (all the 1:24,000 data will still be there, it’ll just be shrunk into fine print). A lot of people prefer to print on 11in x 17in paper, which makes it easier to read some of the small details.
- The maps are numbered north to south generally. Some of the maps have “letters” as well: (i.e. WY28a). These are instances where alternate routes required extra maps. Some of these maps provide coverage of small “missing areas” between some maps, or they are “zoomed-in” detail sections of some of the
- 1:100,000-base maps. It should be easy to figure out what’s what when you’re out on the trail.
The Route
- The red lines show what I can best describe as “the main route”. Usually it’s the designated CDT route, and usually it’s the route I prefer. In a few cases, it’s neither of those things. Away, it’s a continuous route. If you find a map with two red lines… just hike either one (do not hike in a circle… unless you want to hike in a circle).
- The purple lines show alternate routes. Usually, I’ve included notes to describe or criticize the alternate routes.
- There are a some maps with grey lines. These are roads or trails that were not clearly visible on the USGS maps, but I wanted to show them for reference. I have only done this in very selected instances. There are plenty of roads & trails crossing the CDT not marked on the maps. These are often described in the notes.
- Any dashed line indicates that there is no tread on the ground in that section (so, it’s cross-country). Keep in mind that many parts of the CDT have occasional cairns or signposts or very faint tread or nothing at all… I apologize if they’re not consistently marked on the maps. If you hike the trail, hopefully you’ll understand why it’s very difficult to decide if a particular route is technically cross-country or not.
- The mileages on the maps show the estimated distance between any two “stars”. I added the mileages to make it easier to plan your day. I measured the mileages by “rolling” the distances on a printed set of maps with an electronic distance measuring tool (and in some places, just eye-balling it). It’s kind of difficult to get an accurate measure when there are lots of twists and turns in the trail… especially at a scale of ~1:60,000! So, the mileages might be a little “off”… usually short if anything (but consistently short I hope). I can almost guarantee that my mileages won’t exactly match-up with mileages in the guidebooks or other maps. But in the end, they should help you out. There are some places without mileages marked – it’s just a lot of work to keep all these updated… You get to have fun “eyeballing it” in those places!
The Notes
- The numbered notes should be self-explanatory. The numbers are generally “very near” to whatever is referenced.
- I’ve made some notes regarding road numbers and private property in many places, but not “everywhere”.
- The map labels in the upper left hand corner of each map are there to help you keep the maps organized in case you print a set. All the labels are in the NW corner of the map. All writing on the maps is such that geographic north is “straight up”.
- The missing areas, or “white spaces” on the edges of many maps are there to save ink in the event that you want to print a set. I’ve tried not to erase anything vital.
- The maps have been pretty extensively overhauled year after year after year for the past 15 years. Special thanks to everyone who has given me feedback – there are too many of you to list. The maps work because of YOU!
Avenza Maps App (PDF Maps).
If you’re carrying a smartphone, you can use the free Avenza Maps app. This will enable you to see your position right on the map as you go. You don’t need a cell connection to use the app. The map data is downloaded to your phone, so you can use these off-line. As of this writing (early March) the maps on the Avenza are still from 2016, but I’m working to update them… and expect to have that done by late March 2020. You can check back here for news. Though, Avenza says if you download the current maps, you’ll be automatically notified when the new versions are available.
Use the method below to get these maps, and do not go to the Avenza store within the app. Their search engine isn’t very good, and won’t find all the maps. But if you do the following steps, you’ll find them all pretty easily.
- First install the Avenza Maps app from the iTunes Apps store, or Google Play.
- Back on your PC, go to the Avenza website at www.avenzamaps.com, create an account, and log-in.
- Then go here: https://www.avenzamaps.com/vendor/1321/jonathan-ley
- “Buy” the maps you need. (They’re all there, and they’re free).
- Then go on your mobile device to Avenza Maps, log into your Map Store account, and download the bundles to your device.
Using the Compass Rose
- The Compass Rose can be used to determine your location using a paper map plus a stand-alone GPS that can provide a bearing.
- Click here for more information about using the Compass Rose with the maps.
Printing the maps
- Color laser printers have gotten a lot better in the past couple years, and in my opinion are now the best choice for printing the maps. These printers might cost more up-front, but the color toner lasts for thousands of prints (saving you money in the long run). Color laser prints are also much more durable wrt/ wetness, and you can probably get-away with slightly cheaper paper. The laser printer ink might flake-off at folds in the paper, but the maps should hold up well enough for the amount of time you need them. If you’re going through 2/day, they don’t need to last long.
- Most people use ink-jet printers to print the maps. If you do this, I recommend using good ink-jet paper. There are a variety of brands, but the point is – don’t skimp. The advantage of using good paper is that the fine detailed writing in the maps will be clear. With normal paper, the ink will “bleed” just a little, which blurs details… no matter how good your printer is. There is a LOT of fine detail on these maps. You can find high resolution paper at any office supply or computer store.
- High resolution paper also holds up reasonably well when it gets wet. Inkjet ink will bleed profusely on regular paper with the slightest moisture. This is a very important consideration out on the trail.
- Waterproof paper is now available, but it is expensive and usually not biodegradable. On a typical hike you’ll go through about 2 maps a day. I wouldn’t bother with the waterproof paper unless you intend to keep the maps for a long time, use them again, or pass them along to future hikers.
- The where’s and how’s of printing will depend on your printer and printer set-up & the software you use to print. In order to see the detail on the images, you will need a printer that prints at least 300dpi. Nearly every ink-jet printer sold in the last 6 years will print at this resolution. Color laser printers sold in the last 2-3 years should be ok too. If you have an old or extremely low-end ink-jet that cannot print at 300dpi, the printouts will not be clear.
- Tip: If you want to print double-sided & don’t have a duplexer, try printing odd-numbered maps first, then run the paper through again & print the even maps. You’ll get a few 1-sided maps at the end of some sections, but it’ll save a lot of paper.
- I don’t recommend using black-and-white laser printers. There is a lot of information on the maps that can only be seen in color.
- Some people have taken the maps to their local copy-shop to have them printed. This can work fine, but is usually quite costly. The results you’ll get won’t be any better than home-printing. If you’re just not comfortable with computers and printing, etc… Printing the maps is a great way to learn!… or ask a friend, neighbor or family member. Surely someone you know would be willing to help!
- Another option: Some former hikers are now selling prints of the maps. These are a great option for a lot of people. Just google “prints of CDT maps from Jonathan Ley”, and you should get some results.


