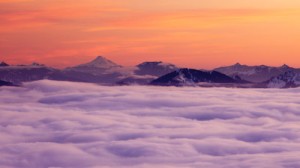
Sometimes, the most interesting aspect of a scene is impossible to capture in a still frame – swirling clouds, the movement of tides, patterns of shadows, the moon or sun… these all make excellent subjects for time-lapse photography.
But, how do you do it?
In short: set up your camera on a tripod, take a series of images every 5 seconds or so, and later assemble those stills into a video. Simple?… Ok, maybe a little more explanation would help.
First, you need an interesting scene, where something is happening… slowly. Clouds are nearly always in motion, and make great time-lapse subjects. Likewise, the shadows of clouds can add real drama to a scene. Maybe you’d like to show how a frosty leaf melts in the morning sun. Your imagination is the only limit.
Just remember – if you have a single camera and are using it to shoot a time-lapse movie, that’s all you’ll be shooting while it’s happening. Sometimes, you just have to make a choice.
Ok, so now you have an interesting scene. It’s time to go manual – manual focus, manual exposure. If you leave your camera on automatic exposure, the settings will change as the light changes. This will lead to some really distracting flickering as individual frames will be slightly brighter or darker. While there is software available to fix this (more on that later), it’s a lot easier to avoid this problem. If you’re doing something really fancy – like a time-lapse that goes from day into night… you might need to use auto-exposure, and fix the flickering later.
If the scene is getting brighter through time, best to start the first image underexposed, so that by the end of your shooting period, the scene won’t be over-exposed. Vice-versa with scenes that are getting darker.
For this reason, I almost always shoot time-lapse scenes in RAW. Yes, the individual images use more memory, but the results are far better, and this gives me the ability to adjust my exposure settings with a RAW converter.
In the following example, the sun was rising. I knew the scene would be getting brighter, so I started the time-lapse with the scene under-exposed. It turns out that I didn’t compensate as much as I should have. by the end of the video, the bright clouds were fully blown out. Luckily, the video medium is a little more forgiving with these things:
My camera includes a small-RAW (sRAW) shooting mode. Time-lapse is a great application for sRAW. The image files will be smaller, but still give the flexibility of RAW. You won’t need all those extra pixels for the final video. High-definition video (1080p) is at a resolution of 1920×1080 pixels, that’s only 2 megapixels. My smallest sRAW mode is about 6 megapixels, leaving me plenty of cropping options.
While technically you could stand next to your tripod with a stopwatch and press the shutter release every 5 seconds, it’s a heck of a lot easier with an automated timer/cable release. It just takes a moment to program an interval (say, 5 seconds), and the timer will do all the work. I have a Canon TC-80N3, which works perfectly. There are some other models which work pretty well too.
So, how long to go? A little math can come in handy. If you don’t want your final video to be jerky, you’re going to want a good number of frames per second in the final video. Let’s say your final video will be about 24 frames-per-second. If you shoot a frame every 5 seconds, that’s 12 frames per minute. So, every 2 minutes, you’ll have 24 frames. 2 minutes of real time = 1 second of video. If things are moving really quickly in real time, you might want to take frames faster. I’ve learned that I can never shoot a long enough clip. If the results are good, I always wish I shot twice as much!
Just make sure to have enough available memory in the camera. My camera tells me how many more pictures I can fit – a very handy reference. Though, if you do run out of memory part way through a time-lapse photo, you might be able to change the memory card quickly without noticing too much of a gap in the final video.
If it’s dark outside, you might need a pretty long exposure for each shot. For example, the video below starts with a time-lapse of the night sky. Each frame was 30 seconds, and I included a noise-reduction frame which added another 30 seconds. I added a 5 second safety buffer to my interval timer, so I was taking a frame every 65 seconds… It took 3 hours to get about 10 seconds of video!
So, now we have 300 (or maybe 3000) still images in sequence. From here, I use a similar workflow to still photos. First, I import them into Lightroom. The next steps are easier to describe in a video:
If you’re interested in LRTimelapse, visit Gunther’s site here. The software is free to download, but I’d recommend donating some money to his cause.
Now we have a series of still images. How to make them into a video? There is a lot of fine video editing software on the market. I’ve found that Sony Vegas does a pretty good job for a reasonable price. Plus, it has a capability to handle time lapse images very smoothly:
So, there you have it. I hope you found this a little helpful for getting started creating your own time-lapse movies. Here’s a version of the time-lapse I created in the above two videos…
