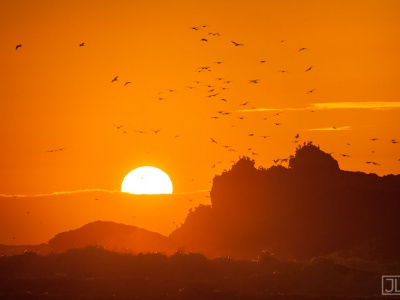
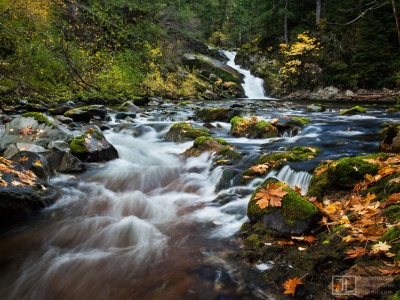
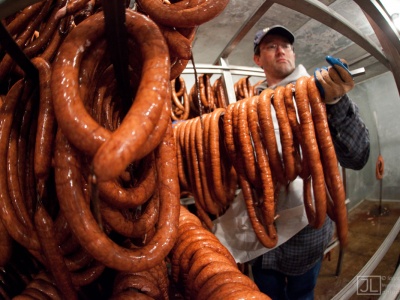
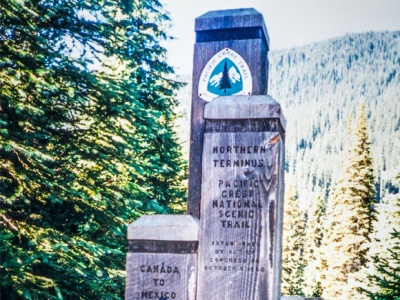
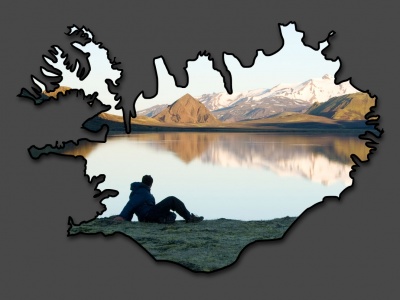
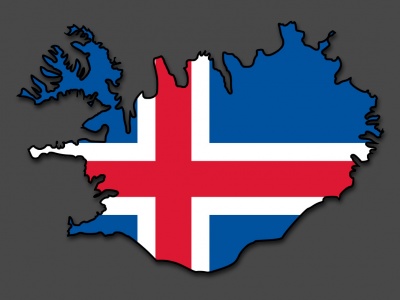
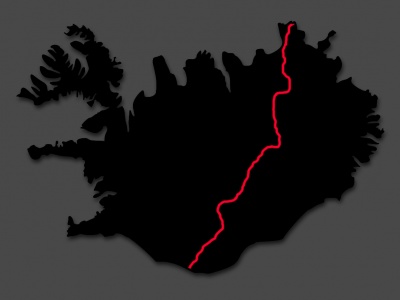
Rowena Crest / Tom McCall Point
I left home around 5am to drive the 1.5 hours out to Rowena Crest to catch the sunrise. It might seem a bit extreme to get moving so early for something that’s supposed to be “fun”, like photography. But, the early morning light has a quality that can’t be duplicated. Getting up early is just one more ingredient to making compelling images.
Click here to see the Tom McCall Point gallery
Grass Widows are the first flower to pop out of the ground in this area. When they’re at peak bloom, they can fill some areas with a wash of magenta. I started at one field I’d visited before, about a mile west of Rowena Crest. The grass widows here were still about a week before peak, but there were a number blooming already. The sun was going to rise soon, so I scoped out a spot with an interesting mix of flowers and rocks, and positioned myself so that the field would be cross-lit, hopefully giving me a good mix of light and shadow to add some more depth to the image. The sun lit up some trees to my side with a deep orange glow, and the shadow line crept toward me. However, it was not to be. Just before the sun arrived at my location, a band of clouds moved in and squashed the moment. Oh well, that’s the nature of nature.
I made the most of it however. The flowers were covered in dew in the early morning, and the air was relatively still. The light was still coming from one direction, filtered through the clouds near the horizon. These are all conditions that only exist in the early morning in a place like this. So, even though I didn’t get the full sunrise experience, conditions were still pretty good – especially for some closeups.
With this shot, I liked how the 3 flowers all showed different sides or stages of the grass widows. I moved my angle to get some separation between the 3 flowers. I had to be very careful not to bump the flowers, as I didn’t want to knock off the dew. One of the hardest things with images like this is picking what to focus on. The two things I wanted most in focus were the dew on the front flower and the stamen of the front flower. Keeping the tip of the front flower in focus was also important. The viewer’s eye expects this to be a sharp edge, so it just wouldn’t look right if that was not in focus. I tried number of minor variations on the focus. I was using a 90mm tilt/shift lens, so that gave me even more options than usual. I was able to tilt the focal plane to more closely align with the main elements of the image. While it’s fine that the flowers in the rear are out of focus, I wanted them to be recognizable as flowers. Since one of the flowers is in focus, the brain can easily imagine what the other flowers look like, and isn’t left guessing.
I then moved up the road a bit to Rowena Crest. The grass widows here were more in full bloom. I wanted to capture a whole field of these flowers, but still get one of the close enough so you could see the detail… and show enough of the environment to give a sense of place. I again used a tilt/shift lens (24mm this time), and moved in very close to this clump of flowers. These were probably only ~6 inches from the front of my lens – right at the minimum focal distance for the lens. I tilted the focal plane to match the ground… this helped, but I still had 2 problems to deal with. The wind had picked up, so I needed a fast shutter speed. I bumped up to ISO1250 (I try not to go much higher than that for these kinds of nature images, as it helps give a more accurate tonal balance). That still wasn’t fast enough, so I had to use a slightly wider aperture than I might have prefered, around f8 I think. This did bring enough focus so that you can see there is a whole field of flowers, and see the mountain in the distance.
Finally, I hiked up that mountain… Tom McCall point. Along the way, I came across these oak trees. The moss was so thick and heavy, it was dripping down the sides of the trunks. I wanted to capture the thickness of this moss.
An added bonus was the soft directional light, which really makes scenes like this glow. The sun was a little higher in the sky now, and being filtered through some high clouds. This softened the light just enough to reduce contrast, but was still directional light – which adds depth. I tried a number of locations before finding one that had a good number of the trees showing. Again, focus is difficult with shots like this. When you have a situation like this, focusing on the subject nearest the lens can work best. These subjects will have the most detail, and let the viewer see that detail, and imagine the same detail in the background. One thing I was surprised and happy with were how the weeds below the trees hid their bases. So, it looks like the green trunks are growing out of a brown fur. This gives a little dreamy quality to the image.
It was a lot of driving on little sleep… but all in all, I was happy with the results!
And It Was…
Another in my short series: “About the Shot”… When you see a set of aging building with this much character, it’s not hard to know there’s a good shot to be had… somewhere. Sometimes, the trick is simply finding the right place to stand.
This old homestead was once someone’s brand new dream. Someone nailed all those shingles to the wall with plans in their head, hope in their heart, and a world of possibilities on their horizon. Maybe their dream turned out well. Maybe they lived a long happy life here. Whatever the truth of the matter, these old buildings are decaying, and that’s the story that can be told in this photograph.
One thing I try to do with nearly every scene is bring a sense of depth to a two-dimensional image. Most directly, the human brain perceives depth because our heads have two eyes. Each sees a slightly different image, and our brain interprets these to realize a 3 dimensional world. But, there are more ways for the eye and mind to perceive depth.
One approaches that’s strongly employed in this image is what I like to call near-and-far. The building at the center and the building in the distance are both familiar human-scale objects. We know how big the house is, and we know how big the barn is. When we see them both together, we know about how much distance is between them. This brings the viewer’s mind “into” the picture… into the space between the buildings. Can you imagine how far it is between these buildings? It’s easy to get a sense for it. The windows and doorways on both buildings just add to this effect.
Similarly, the grasses in the foreground, and the grain of the wood at the left repeat further away from the eye. Even though we can’t see all the detail in the grasses and grain in the distance, we know it exists. We know what it looks like. This gives the image more perceived detail and depth.
Probably the most obvious depth element is the angular view of the house at the right. Straight lines converge as they go to the distance… and that’s easy to see here.
The framing of this photo is obvious (if anything, a bit too obvious and contrived). I took care to make sure the edges of the buildings all had space around them. The building at the left is simply foreground. It can be a little difficult to know just how much of such a building to leave in the frame. My rule is to leave just enough so that it’s obvious what the cropped item is, but not so much that it overwhelms the image. If I had left less of the building at the left, it would have looked like a sliver, and made the viewer curious to know what it was… and been a distraction. If I had left more of the building, it would have crowded the frame and become the subject of the image. As it is the building serves two purposes – both a “frame” and a foreground.
The original image was quite pretty in full color. The grasses were green, the sky a powder blue with white streaking clouds, and the buildings a nice silver. However, this conflicted with the story I first was drawn to in this image. The colors were all “alive”, but the buildings were dead, and that was too much conflict. An autumn or winter scene would work well in color, but there was so much lively green in this image, it just had to go.
One last comment about the wires connecting the buildings. I was shooting this with a number of other photographers standing nearby who declined to take the image because of the wires. While I can understand that you might want to crop-out wires in many landscape situations, this is one case where the wires added to the scene. The wires connect the two buildings, and frame the barn. The wires are decaying and drooping as well, and part of the story. It’s easy to get something in your head as a rule (must… not… photograph… telephone… wires!!!), but just remember that every rule needs to be broken from time to time – otherwise, the world would be a boring and predictable place. I love the wires!
Birds On a Log…
Photographing birds is not easy. It requires a good amount of patience, luck and skill… and having the right equipment helps too. This particular shot would have never happened if I hadn’t first used my ears. It was early in the morning… the time when hungry birds have just woken up, and are most active – looking for food to start their day. I heard some loud persistent peeps, and took a look.
Two American Dipper chicks were waiting on a rotten log on the shore of the Deschutes River. An adult was fetching insect larvae out of the rushing waters, returning with a new bug every few minutes. It seemed the chicks had bottomless stomachs. I figured the parent would make at least a few more trips. So, I thought I’d see what I could get.
I quickly put on my 100mm-400mm zoom lens – with the lens hood on (I mostly use the lens hood for protection – to prevent bumping the glass against something). For most bird photography, it takes all the reach you can get, so I extended the lens out to 400mm and kept it there.
I knew that I’d need a pretty fast shutter speed. 1/400 second or faster if possible. First I flipped the camera to Aperture priority and moved the lens to wide-open (in this case f5.6) to let the most light in as possible. I pointed the camera at a few things near the scene and looked at the auto-metering the camera was giving me. When you’re zoomed-in this tight, metering can be all over the map. If you move a few feet one way or the other, the camera will meter on a dark log or the bright rapids… the difference in shutter speed can vary a ton. In this case, varying anywhere from 1/10 of a second to 1/100. So, I picked something in the middle of the range… f5.6 & 1/25 of a second.
I then switched the camera to Manual exposure, and dialed-in these same settings – f5.6 & 1/25 second. Now, I didn’t have to worry about the camera metering changing the exposure and messing up my shots. Of course, 1/25 of a second was way too slow. These quick little birds would be nothing but gray blurry blobs at 1/25 of a second. My camera was set at ISO=100. I had to bump up the ISO sensitivity to get a faster shutter speed. It was time to count clicks.
I clicked the knob that controls the shutter speed to something much faster… say 1/400 second. Click, click, click, click, click, click, click, click… 12 clicks. Each click of a knob represented changing my exposure by 1/3 of a stop of light. After 12 clicks, I was at 1/400. While it helps to know how many stops you’re clicking through, in the field, you often don’t have time to do the calculations. It’s a heck of a lot easier and faster to count clicks. You don’t have to know any math to do this. If you can count, you can do it.
Before I adjusted anything, I had a good exposure. Now, I was “12 clicks off”. I needed to make up for all that clicking. So, I started clicking away on my ISO to compensate… click, click, click (now I was at ISO 200), click click click, (ISO 400), click, click, click (ISO 800), click click click (ISO 1600). That’s 12 clicks. I was back at a good exposure, and now I had the shutter speed I needed. ISO1600 will be a little more grainy, but grainy is better than blurry!
One more quick item was to make sure my focus was set for the center point. This way I’d know what I was focusing on. If you leave your autofocus to pick whatever point it wants, it’ll invariably pick the wrong point… and you’ll get a very crisp image of a log with some blurry birds in the background. At 400mm & f5.6, with a subject ~20ft away, the depth of field is very shallow – maybe half an inch at most. There just isn’t any room for focus error.
This whole business of changing the lens, and getting the shutter speed I needed (and making sure that switches like the autofocus and image stabilizer were flipped correctly) took about a minute, max. I simply had to ignore the birds while I did this. There’s no point in skipping any of this. There’s no point in shooting before you’re ready to shoot. I don’t care how good the scene is. If your camera isn’t adjusted correctly, the results are going to suck. Further to that point… you simply have to know this stuff to get a shot like this. If you’re relying on your camera’s automated controls to do the work, you’re going to be disappointed again and again.
So, now I had a camera ready for action. It was time for the patience and luck.
The chicks were moving up and down the log. Sometimes they’d go out of view, and other times they’d come very close. With the noise and movement of the water, they were fairly oblivious to me. It helped that some low bushes partially obscured my body. My first goal was to just get “something”… getting something is always better than waiting and getting nothing. So, I stood where I was and snapped a few shots of the chicks. I checked the histogram on the shot to make sure my exposure was still good. If it wasn’t, maybe I could click the ISO up or down a couple clicks to compensate.
I decided it was better to stay where I was rather than risking large movements and chasing the whole family off. My next goal was to get “something a little better”. I waited for the parent to return with some food, and tried to get a more expressive shot. The results weren’t bad, but I didn’t really like the background I was getting. The chicks were on the side of the log, so that the wood was immediately behind them. With this setup, I wasn’t getting much blur to the background, and not much contrast between the dark gray birds and the dark brown wood. I crouched down in hopes that the birds would jump up on the top of the log. Crouching down also enabled me to hide a bit and get a little closer to the action – which is always helpful in bird photography.
The whole family moved to the other side of the log for the next couple bugs. I was getting a little frustrated, but understood the value of patience. The birds moved fast, and I had to be ready. Before I knew it – bam. There was the parent with a juicy bug, and two chicks on top of the log with gaping red mouths. I nailed the focus on the chick and immediately snapped off a series of shots. The whole scene lasted maybe 5 seconds at most.
There are some things I wish I could fix with this shot. The blurry branch above the center chick is a little distracting, and it’d help if the birds had a little catch light in their eyes (that little sparkle that quite often comes from a flash). But, I didn’t have a flash with me, and I couldn’t direct the birds where to go. So, I can’t really complain. There’s a lot more that I like about the shot – all the birds are in nearly the same focal plane. Their feet show some action, the bright red mouths of the chicks are a great contrast with the otherwise drab colors, and the texture of the log is nice, the surface of the log makes a nice diagonal line, the lighting is smooth and indirect, and the whole thing tells a story. I’ll take it!
Crashing Waves
A really quick post this time… At the coast the previous night, there had been a windstorm which created gigantic waves. The following afternoon, we passed by a roadside lookout near Depoe Bay, where the waves were still crashing-in. Of course, I couldn’t resist taking a few shots.
Click here to see the Central Oregon Coast gallery
Waves are pretty unpredictable, so I took dozens of shots of the action. I was trying to get a good mix of rock and crashing waves, and timing was key. Sometimes the waves would cover the rocks in the foreground… sometimes the mist from the crashing waves obscured the rocks in the distance.
By using a long focal length – near 400mm – I was able to compress the elements in the image. Things both near and far look of similar size. This can work well for busy scenes like this. The layers of rocks and mist help maintain a sense of depth – you can readily see what is in front and what is in the distance. Another thing that really helps with this shot is the lighting. The scene is lit from the back/right side. This makes the mist glow, and adds a lot of dramatic shadow to the waves. In the opposite direction, the waves were front-lit. That added a lot of color to the waves, but there were no shadows, and the sense of depth was lost. A cloud passed by for part of the time I was watching the waves, and this also killed the depth in the image… this was one scene that really worked best in full sun.
There’s also one element in this picture you don’t see – the house perched on the rocks just outside the frame. The right kind of house might have added to the drama of the scene, but this particular house wasn’t right for that. This did limit my framing somewhat – I couldn’t go any further to the left, but in the end, wasn’t too much of a problem.
One thing I wished I’d done at this shot was to take some video. The scene was so chaotic and ever-changing, I think video would have done it better justice… well, next time!
Drift Creek, and Drift Creek
Along the central Oregon Coast, there are two creeks named “Drift Creek”. Each is a window back in time to when the coastal forests were intact and pristine.
Click here to see the Drift Creek gallery
These destinations are within about 50 miles of each other, which can lead to a bit of confusion. On this trip, I was joined by a friend who recently moved to the coast & looking to explore the area a bit more. Neither of us had visited these forest trails before. We first visited the northern Drift Creek, not far from Lincoln City. This is certainly the more well-known of the Drift Creeks, because of both the proximity to Lincoln City, the easy trailhead access, and a short rewarding hike to a stunning waterfall – Drift Creek Falls.
The trail is very well maintained (actually gravel for a good part of the way) and heads downhill about 1.5 miles through second-growth to the waterfall. Along the way, there is an alternate trail – the north loop – which detours through a small stand of old-growth forest. It’s not a huge section of old growth, but very nice for what it is. It’s also striking to see how the character of the forest changes when it’s dominated by large old trees. Soon after this alternate loop re-connects with the main trail, the path crosses above Drift Creek Falls on a large suspension bridge. The bridge and the falls is what brings most people to visit.
This isn’t the best time of year to photograph this area. The autumn leaves have mostly fallen from the trees, leaving them looking like a random bundle of barren twigs. But, this isn’t all bad… views are more open, and the moss is a richer green in the winter months. Plus, a recent downpour of rain made Drift Creek Falls gush. Many waterfalls look more elegant with a lower flow – more detail in the rocks under the falls is revealed. I’m not exactly sure if Drift Creek is better with a low flow or high flow, but I think the higher flow did make the falls expand horizontally – adding more side channels, which adds a bit of interest. Also, the higher flow made this waterfall stream away from the wall a bit… during times of lower flow Drift Creek Falls slides down against the face of the canyon wall, which isn’t as photographically dynamic or interesting.
I tried some very wide angle shooting from the base of the falls. My goal was to stitch together up to 15 images all taken at 24mm to make a giant mosaic that was otherwise not possible. Sure the result is pretty, but perhaps a bit too straightforward. When you go this wide, you are basically capturing “everything”. Much of what makes photography interesting and challenging is deciding what to leave out of the frame. Here, everything is in the frame – there is not much visual choice. Anyway, with a subject like Drift Creek Falls, there is only so much you can do. There isn’t a lot of room to work with at the bottom of the falls, and you get what you see. Another issue is that such a wide shot creates a lot of distortion. Often this isn’t noticeable with landscape images, but when the image contains elements that are supposed to be straight, the distortion is a real problem. I had to work a little Photoshop magic after this image was stitched together in order to straighten the tree at the left, and attempt to straighten the bridge (which is still a bit bent, but that’s ok… I mean, lots of bridges are curved, right?)
Near the falls, I was delighted to find this scene. One important key to photographing old forest like these is looking for just the right lighting. In direct sunlight, there is simply too much harsh contrast for pleasing results. I’ve very rarely seen images of forests in full sunlight that “work”. If the light is flat (i.e. from a solid gray sky), the results will be much better, but the forest will look as flat as the light. Ideally, I look for diffuse but side-directional lighting. This puts a soft cast on the sides of the tree trunks, giving them a three-dimensional feel. This kind of lighting is not always easy to come by however. In early morning or late evening, most of the light from the sky will be coming from one direction. If there is an isolated cloud bank diffusing the sunlight, all the better. But, even this kind of diffuse lighting can be shaded by a thick forest canopy, and down where you are, the light becomes flat again. The best situation to look for is a “hole” in the forest canopy that allows the diffuse light to come through from one direction and light up the lower trunks. Often these holes in the forest will be at the edge of a forest, or where some large tree has fallen down. An added bonus to a hole in the forest is that it’ll give you room to shoot – giving you more options to move around and play with the composition. The image at the start of this paragraph was an almost ideal situation – I had a nice foreground with some great roots for leading lines, space behind the foreground, and some large softly side-lit trees in the background. Compare this to the more flat image below… which is still nice, but missing the lighting and foreground that works so well in the first forest image.
There was still a bit of daylight remaining, so we decided to head down the road to visit the other Drift Creek - the Drift Creek Wilderness (the largest designated wilderness area along the Oregon Coast). This is a completely different area, closer to Waldport – perhaps 50 miles to the south of Drift Creek Falls. There is no dramatic waterfall along this Drift Creek, and the road we took to the trailhead, while in good condition, was a narrow and winding 20 miles. This trailhead accesses the northern portion of the Drift Creek Wilderness.
It was nearly dark by the time we arrived, so we only had the opportunity to hike a small portion of the trail, and get a taste of what was there. Certainly, this is a place I’ll have to return to. The trail passes through a substantial old growth area – mostly Western Hemlock and Douglas Fir. The last giant mushrooms of autumn were melting in the wetness… and a few leaves hung on in the understory. I did manage a few shots of the forest, but the light was pretty flat, and exposures were running at 30 seconds. So, we turned around before too long, determined to return again on a day where we had more time…
Southern Oregon Coast
Well, a quick live report from Bandon, Oregon… I’m down here as an instructor with Best of the Northwest Photo Workshops. We’ll be visiting a number of locations along the southern Oregon coast, but are basing ourselves in Bandon, Oregon… which is home to some of the more dramatic landscapes along the entire Oregon coastline. I’ll add to this post as the weekend progresses, and I have more photos to post. You can also see the latest images at my gallery here:
Click here to see the Southern Oregon Coast gallery.
I might create different galleries for the various shooting locations we’re visiting in this area. We’ll see how this works (it’s kind of an experiment at this point, and actually… I’m not sure much of anyone will be reading this anyway
.
Last night, we headed out to the beach right across the street for some night photography. The idea was to “paint” the seastacks, with stars behind them. The stars were out in force, with the Milky Way adding a curtain of white down to the horizon – very nice. As it turns out, there was enough ambient light from the nearby hotel & other buildings to light the rocks just about the right amount anyway.
This shot was a 30 minute exposure, looking over the sea stacks. It’s an interesting thing, doing a 30 minute exposure. I mean, it’s a real commitment. I had to stand out there in the dark and cold, while nothing happened… for 30 minutes. Oh poor little old me. I guess it was kind of serene in a way, I thought about all of the billions and billions of stars, and the alien who was likely looking back at me from some distant galaxy. I stretched my aching musles. And… well, that’s about it. I just plain waited, I guess. I couldn’t really run inside while the photo was being taken, as I didn’t want my camera to wind up in the ocean. In case anyone is curious, this image was 30 mintues long, at f4, and ISO 100. I calculted this by taking a 30 second exposure at ISO 6400 that turned out OK. So, ISO 3200 would have been 1 minute, ISO 1600 = 2 minutes, ISO 800 = 4 minutes, ISO 400 = 8 minutes, ISO 200 = 16 minutes, ISO 100 = 32 minutes (and I rounded to 30 minutes). And I did this in my head – impressed? (OK, I didn’t think so).
When the image was finally “taken”, I had to wait another 30 minutes for the camera to take a “dark frame” to do noise reduction. But, I was able to do that back in the parking lot, and go warm up in the hotel room. Though, I did leave the camera outside in the cold while it processed… it’s a good idea to keep the temperature of the sensor constant while doing dark-frame noise reduction, as the noise pattern is influenced by the temperature. Basically, the camera takes another image of the same length, but with the shutter closed. So, it’s a picture of the noise pattern on the sensor (very clever, those camera engineers). Then, the camera subtracts-out the noise, and you get a pretty darn clean image.
The next day has been a lot more scouting and getting used to shooting around here. In the morning, we checked out the Coquille River Lighthouse. The most interesting thing about it was the huge population of Brown Pelicans that came past the area in wave after wave. Thousands of these birds are congregating around this area right now. I’m not sure why, but it likely has to do with the weather or food… or some seasonal pattern. There’s not much else in the pelican’s life to deal with. Anyway, it was a bit of a challenge to get any decent shots of them, as it was pretty dark when we were down there, and they were slowly migrating to the other side of the river – quite some distance away.
Later, we headed down to a forested area, and were treated with a similar abundance… of mushrooms. Many types were poking out through the forest duff. Though, the recent rain had them all a bit slimy. The slime factor was both good and bad. The water can make the colors of the mushrooms richer, but it also turns them into, well… mush. The most striking of the mushrooms were these Amanita. These might be beautiful, but they’re not something you want to eat, unless you want to hallucinate, get sick, and maybe even die. The color of this mushroom is especially nice to photograph in contrast to the green plants and otherwise drab forest undergrowth.
Next morning… we just got back from more shooting in the Bandon, Oregon area. The weather has improved… perhaps too much. Ideally, we’re looking for nice clouds above with clear horizons to the side. This allows the sun to light up the clouds in the morning or evening. Anyway, it’s much better to have a clear sunrise with few clouds than a cloudy or rainy sunrise that completely hides the sun (which makes the moment of surise kind of meaningless). Well, I was able to get this shot of the Cape Blanco lighthouse just as the sun crested over the ridge, and gave nice side-light to the dead grasses below the lighthouse. The only way to get enough contrast in the image to actually see these funky plants was to get down low and have the plain sky behind them. Luckily, there was just enough space for the lighthouse to provide a little context and interest to the image. There are zillions of lighthouse pictures out there, and plenty of this lighthouse in particular. So, I’m always looking for some different angles. Another great thing to look for are various details around the lighthouse. There are usually things that are endemic to lighthouses, and help make interesting images (like ropes, buoys, peeling paint, fences, etc.) I didn’t have time to do much of that, but some people in our group were able to get some nice shots of things like that.
In the evening, we headed to a section of coast just north of Cape Blanco. This involved hiking a couple miles through the same mushroom-infested forest we visited the other day. It was interesting to see how only a couple days had changed some familiar mushrooms, and seen the birth of new ones. The sun and clouds didn’t really cooperate too much, so we were left with a bit of gray drabness. So, we had to focus on small subjects, and more on the form and shape of things. Luckily, we did have the mushrooms to keep us busy. The sun did poke out through a hole in the clouds for just a few seconds as we were heading out, but most of us were in the forest, making it pretty hard to take advantage of the amber rays.
After dinner, the group headed back down to Bandon Beach for some night shooting. Conditions were pretty similar to the first night we did this. I had spotted an area that I wanted to photograph, and headed back there to see what I could come up with. With this shot, I set up my tripod in a small stream that was flowing down the beach. The lights from the hotel were lighting up the rocks again, and giving just a small bit of highlight to the ripples in the stream. The ripples work as leading lines into the frame, and just add another point of interest. Revisiting locations and shooting conditions like this really give a good way to think about a shot and plan something special. It doesn’t always work, but when it does…
The next morning we just walked across the street to Bandon Beach for sunrise. The sun did indeed rise… behind a thick wall of clouds. Well, a little color did appear through the blanket, but not much, and not for long. Still, it was a good opportunity to try some “sloshy water” shots. The idea with these is to use a shutter speed of about a second while some turbulent water sloshes up, over and around rocks in the foreground. The result is usually pretty random… but every now and then, an interesting image happens. One of the hardest parts of doing this kind of shot is finding a spot to do it in. It really helps if the water is sloshing in the immediate forground. The trouble is that you can’t hold back the ocean, and the immediate forground is near your feet. Plus, sloshy water tends to also be deep. So, one of the best solutions is to find some rocks in the inter-tidal zone that are a few feet high, and hang out there. Still, you’re playing with fire (well, water), so expect some wet feet!
Evening at Bandon Beach was spectacular. It was one of the better sunsets I’ve seen, and to be in such an interesting place with a camera and a group of dedicated photographers was wonderful. The only problem was that there was so much to shoot, it was hard to narrow things down. Tidepools, pelicans, flaming red skies, crashing waves, and contorted rocks… these were all in abundance. Anyway, I just had to make some decisions. I did take a few shots of the Sea Anemones and Starfish, a few of the crashing waves… A few of us had a moment with a wayward pelican that was alone on the beach. I got some nice photos of him standing there, but when he took off I missed the focus on what would have been the best shot. Dang. Oh well, I did manage to get a nice silohuette of penguins on a rock far offshore. The “great ball of fire” is a great compositional element if you have something compelling to put in front of it. Even after the sun set, we continued shooting the forms of sea stacks and the glowing reds and purples reflected in the wet sand.
Verboort Sausage Dinner
The first Saturday of each November is time for the annual sausage dinner at Visitation Parish in Verboort Oregon. So what does this have to do with a photography blog? With all kinds of activities, people doing interesting things, and a good bit of historical context, there are plenty of opportunities for a little photojournalism.
Click here to see the Verboort gallery
Verboort, Oregon is a tiny hamlet, with a population probably not pusing 100. The sausage dinner is a fundraiser for the local Catholic parish/school, and now entering its 75th year, is also a certified tradition.
To make 13 tons of (and they have capacity for 20 tons!) of sausage, takes a lot of work from a lot of volunteers. The Saturday prior to the dinner, a call goes out for all hands. I decided to check it out this year to learn more about the event and just do something fun and rewarding. As for the photos? I wasn’t even sure if they’d allow me to take photos (some thoughts of a secret sausage factory entered my mind). I got to work at around 7am, and spent about 5 hours feeding “casings” (ok, they’re pig intestines… there, I said it.) onto metal rods so they’re primed & ready for the grinder, which forces the ground sausage into the casings (kind of like inflating a balloon). The sausage is then wheeled over to the smokehouse room, where its hung on racks and smoked over the next couple days.
Volunteering gave me the opportunity to learn a bit more about how the whole process works. It gave me time to walk around and see the operation, get to know some of the people involved, ask if I could take some photos, and think about what kinds of photos I wanted to take. One of the basics of photojournalism is simply to document the event… and that’s always my primary goal with these types of events; just get some basic shots that show what happened. If I’m able to work a little and improve the composition, lighting, or timing of the various shots, that’s just a bonus. So, I set to work just documenting each part of the process.
I started with my widest lens – a 15mm fisheye. I went methodically through each part of the process, and used this lens to do what I could. The 15mm fisheye can show a lot of activity all at once – perfect for a situation like this. But, the price to pay is the distortion of the lens. For photojournalistic shots with the 15mm fisheye, I tend to just ignore the distortion. Using non-standard angles (i.e. tilting the camera) can help make these distortions less apparent. If the horzontal and vertical lines are bent, they might as well be tilted too… hopefully the main subject of the image will be interesting enough to make the distortion less apparent.
After the fisheye, I worked my way toward longer focal lengths; 24-70mm, then 85mm. As I already had some “overview” shots with the fisheye, I could then focus on particular elements that added interesting details.
Very often, it takes a lot of shooting to get what I want. For example, one of the more difficult parts of the process to photograph was the job I spent 5 hours doing – loading the casings on the metal rods. The casings are small and dark, and peoples hands are constantly in motion, often covering the subject. The elements of the process include people, the casings, tubs of water… and it’s hard to get all of these in a single shot – and to have it composed, focused, and lit decently (this is one situation where a video would probably be a more effective format). After dozens of tries, I was able to get the image shown on this page.
I returned the following Saturday to witness (and eat) the actual dinner. Unfortunately, a heavy rain limited how many shots I could add to my portfolio. All the outdoor shots pretty much had to wait until some other year. But I did add a few things, and will be back next year to get whatever I missed.
Siouxon Creek
The autumn color around town was looking pretty good, and it seemed to be near peak in the lower mountains as well. So I took a hike up one of my favorite autumn destinations - Siouxon Creek (That’s pronounced SOO-Shawn creek).
Click here to see the Siouxon Creek Gallery
The Siouxon Creek trailhead is located just south of Mt. St. Helens, in southwest Washington State, about a 2 hour drive from Portland. Interestingly, the road is paved the whole way… which is unusual for this kind of hike. Typically, you’ll encounter gravel the last few miles of these roads. The road had been washed out about 6 miles before the trailhead for much of 2009, but was recently repaired.
Siouxon Creek is a pretty straightforward hike along a creek… fairly flat, with a loop at the end. If you include the loop, it’s about 9 miles. But you don’t have to do the loop to have an enjoyable experience, and encounter many photographic opportunities along the way. The trail never strays far from the creek, so there are plenty of places to get down close to the water for some creek in the foreground.
The weather forecast was “mostly sunny”, which is usually not ideal for a trail like this, as bright dappled sunlight through the forest creates too much contrast for a pleasing image. But, this time of year, the sun never gets very high, and Siouxon Creek is in a canyon, with the trail being on the south side. So, the trail itself sees little sun.
It was indeed sunny most of the day. While this didn’t interefere with many shots, I wasn’t able to do justice to the really nice fall color on the opposite side of the creek. The bright colored leaves in full sun were too saturated, and inconsistantly lit (leading to a mottled appearance). I just had to shoot around the sunspots. This cut-down on the number of possible shots & angles, but in a place like Siouxon, there is always plenty to shoot.
So, I spent most of the trip focusing on smaller interesting subjects, like mushrooms. I also managed a few decent shots of the creek, but only in locations where the sun wasn’t a factor. A few clouds did roll by, and that allowed me a few extra opportunities. The sun also moved quite a bit during my ~5 hour visit. Shots that were in shadow on the way out were in sun on the way back. This was a good example of why you don’t want to “save shots for later”. If you see a good photographic opportunity, take it. A good deal of what makes nature photography work is timing, and if you wait… there goes the timing.
This trail is open to mountain bikers, so be aware of that. On one occasion during this hike, I had crouched down really low to get a macro photo of a mushroom, when a couple mountain bikers zipped by. If I’d been in the trail, it would have been ugly, as they couldn’t have seen me. Unfortunately, I didn’t get any shots of the bikers. A couple semi-blurred “motion” shots would have been nice, but it was too hard to predict when a biker would come by, and such a shot takes a bit of planning.
There was so much going on in the first few miles, I ran out of time to include the loop at the end of the trail (which includes a couple more waterfalls). I’ll have to go back… but probably next year, as the leaves have fallen, and the snows are coming!


